Posts

How Using Wood Wax or Polish?

Apply an oil based polish. Use only mineral oil or lemon oil to polish the wood walls. Do not use food based oils like olive oil or coconut oil, as they will oxidize and start to smell over time. You can get mineral oil and lemon oil at your local hardware store or online. Apply the oil to the wood with a clean, dry cloth to remove dirt and give the wood a nice glow.


You can also buy an oil based polish that is made of only mineral oil online or at your local hardware store. Use a liquid wax. Wood wax is a good option for cleaning dirt and dust off the wood walls. It will also protect the wood and give it a nice sheen. You can buy wood wax in liquid form online or at your local hardware store. Use a clean microfiber pad or cloth to apply one coat of the wax over the wood walls. Apply the wax with the grain of the wood. It should dry quickly.


You can then apply another coat if you want to increase the sheen or glow of the wood. You may want to use a dry cloth to remove surface dirt or dust before you apply the liquid wax to the wood walls. Try a paste wax. Wood wax also comes in a paste, which you can apply directly to the wood walls. Paste waxes provide long lasting protection for wood.


It will leave a hard, shiny finish to the wood to protect it from dust and dirt. Look for paste wax online or at your local hardware store. Apply one coat of the paste wax to the wood walls using a clean, dry cloth. Always apply it with the grain of the wood. Then, apply another coat if you want a shinier finish to the wood.


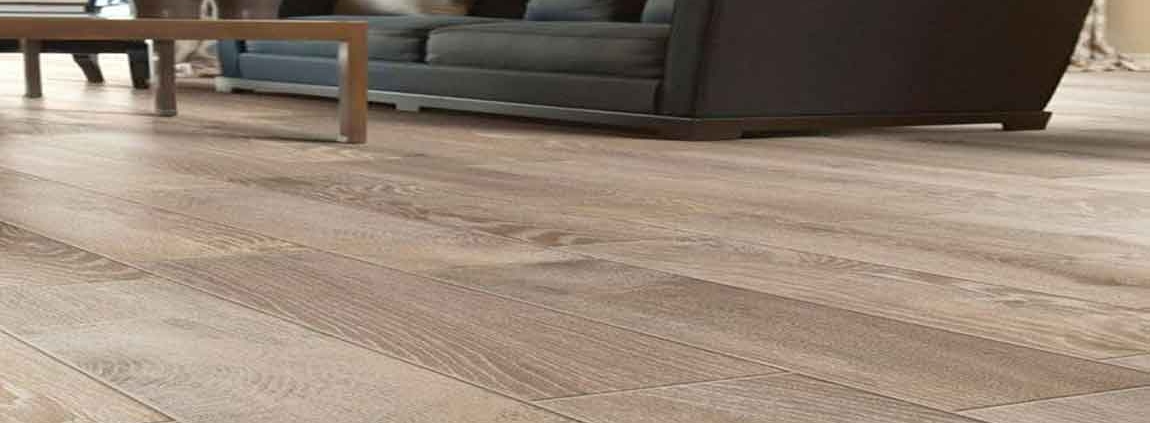
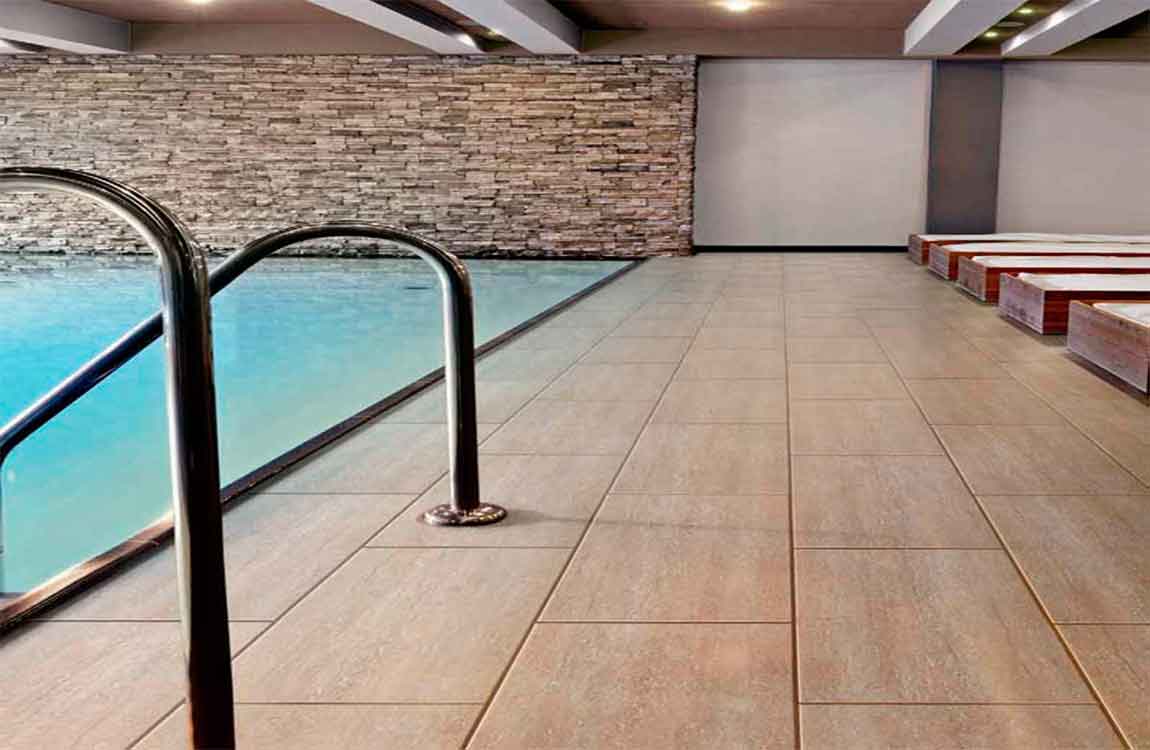
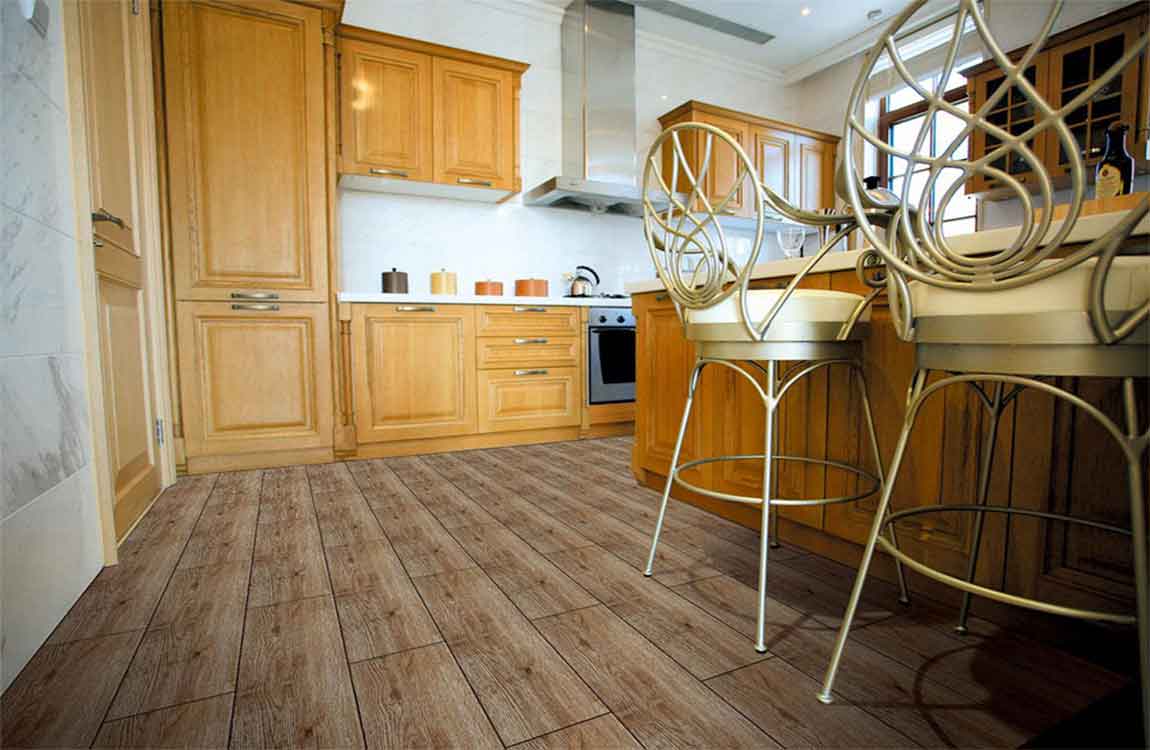
Let the floor air dry. Stay off the floor until it’s completely dry. Most floors will air dry on their own. You do not need to wipe up liquid with a rag or towel. Some floors, however, should never have water sitting on them. If your floor’s manufacturer’s instructions indicate they should always be free of water, pat these floors dry with paper towels.

How Selecting the Toilet Cleaner?


Look for a toilet cleaner that contains sodium hydroxide. Many toilet cleaners contain sodium hydroxide and sodium hypochlorite. These two ingredients help to remove stains and grime on porcelain or tile surfaces as well as grout. Though they can be toxic in large amounts, they do work to effectively clean grout. You may look for common brands of toilet cleaner at your local hardware store or in the cleaning aisle at your grocery store.


Try an eco-friendly toilet cleaner. To avoid exposing yourself or others to harmful chemicals, you may opt for a toilet cleaner that is eco-friendly. There are several toilet cleaners on the market that do not contain harmful chemicals. However, they may not be as effective for cleaning grout, or your toilet bowl, if they do not contain chemicals like sodium hydroxide or sodium hypochlorite.


Many eco-friendly toilet cleaners are made with plant and mineral based products. They may also be scented with lemon, mint, or pine, a bonus for making your grout smell less wet or dirty. Use toilet cleaner that contains bleach with caution. Though you may opt for toilet cleaner that contains bleach to better clean the grout, using bleach can be toxic to your health and possibly damage the tiling around the grout.


Bleach can also strip the water repellant materials that are in the grout, leading to damaged grout in the future, especially in showers or bathrooms. If you do go for a toilet cleaner that contains bleach, make sure you wear rubber gloves, eye protection like safety goggles, and a respirator mask so you are not at risk of inhaling the bleach. You should also wear clothing that you would not mind throwing out, as bleach can damage your clothing.


Smooth the edges of the cut tile glass with a rubbing stone. The wet saw produces clean and even lines, but it’s still a good idea to smooth the edges of the tile so they are less likely to cut you. Hold the stone at 45 degree angle on the front of the tile and run it over the edge to round it out. Smooth the entire edge of the glass tile.

How to Clean Grout with Toilet Cleaner?

Grime and water stains on the grout in your bathroom or your kitchen can be unsightly and hard to clean. You may struggle to clean grout in your home using conventional cleaners and be hesitant to use bleach. Instead, you may try using toilet cleaner to get rid of stains and grime on grout. You should select a toilet cleaner and then clean the grout with the cleaner properly. You should also learn how to maintain the grout in your home so it always looks its best.

Scrub the mildew with a microfiber cloth. Use a microfiber cloth to scrub in between the towels to remove the mildew. It will take some force to scrub out mildew, especially set-in mildew, so scrub the cloth hard in areas where mildew appears. Remember to wear gloves if you’re scrubbing in bleach.

Use a toothbrush for hard-to-reach places. If there is mildew built up in cracks and crevices, use a toothbrush. A toothbrush is a great tool to get into corners and cracks where mildew lingers. Make sure to check cracks where grout is found for mildew. These areas are often neglected during cleaning, which can cause mildew to spread.

Give yourself enough time. There is no secret to removing mildew other than a lot of hard work. Mildew, especially if it’s been built up over long periods of time, can sometimes be difficult to remove. Make sure to give yourself adequate time to fully remove the mildew. For grout that’s heavily infested with mildew, the job may take over an hour to complete.

Use vinegar to remove water stains. Mildew can sometimes cause water deposits to build up on the walls surrounding grout and tiles. If you notice water deposits, saturate a paper towel with white vinegar. Place the towels over the water stains and leave them on for a few hours. Then, remove the paper towels and use a cloth or cleaning brush to scrub out the stains.

How Wiping Your Walls Clean?

Fill a second bucket with clean water. Again, only fill it halfway so the water doesn’t slosh over the sides as you carry it. Use this for rinsing. Depending on how strong your solution is, and/or how much surface you have to wash, refresh the bucket with clean water periodically, as needed. Additionally, you should use a second sponge for rinsing. As with the rinsing water, replace as needed if it becomes too foul as you move along.

Soak and wring your cleaning sponge. Again, only use a soft, light-colored sponge for this to avoid causing permanent streak marks. Soak it in your solution. Then squeeze it dry over your bucket until no more water drips from it.

Work from the top down. First, break your wall up into columns in your head, each about a foot or two (30 to 60 cm) wide. Start cleaning each column where the wall meets the ceiling, and go down from there before proceeding to the next one over. This way you’re more likely to catch any accidental drips of water that may run downward.

Wipe in soft circles. Remember: if your walls are painted, vigorous scrubbing can damage the coat. Use as little pressure as needed. Wipe in a circle, reversing directions occasionally, to further reduce the risk of damage.

Work on one small section at a time. Ideally, you will be using as little liquid as possible to avoid water stains and marks. Still, if left to air-dry, the liquid you did use may cause permanent eyesores, so don’t try to clean the whole column at once. Instead, only wash a couple square feet (60 cm) at a time. If you’re working on a ladder, you may want to work on even smaller sections since you may be going up and down in between the washing, rinsing, and drying.

How Maintaining the Grout?

Squeegee the grout after you shower. Try to get in the habit of using a squeegee to remove water from the surface of the tiles and the grout in your bathroom after you shower. Drying the shower doors and the tiles in the shower helps to prevent a buildup of grime or mineral deposits in your grout. You can attach a squeegee to the inside of your shower with a suction cup so it is right there at the end of your shower. Encourage others in your household to squeegee off the shower once they are done to keep the grout dry and clean.

Use a sealing product on the grout. You can also maintain the grout so it looks its best by using a sealing product on it. Seal the grout once or twice a year so it remains water repellent. This will ensure the grout stays clean and grime-free. You can find sealing products for grout at your local hardware store or online.

Replace the grout if it becomes damaged. If you notice the grout in your bathroom or kitchen is shrivelled, full of mildew, or damaged in any way, try to get it replaced as soon as possible. Replacing the grout will ensure it does not get worse or you do not experience other home repair issues as a result of damaged grout. You may try cleaning the grout before you consider replacing it. If it does not respond well to cleaning, it may be time to switch it out for new grout.

This may also lead to a stain on the tile or the grout. Use a wet mop or a wet cloth to rinse off the cleaner. You should then dry the grout and the tiles well once the cleaner has been rinsed. Use a towel or soft cloth to do this. Do not use cloth that will scratch the surface of the tile or the grout.

Try a salty vinegar mix. Combine ¼ cup (21 grams) salt, ¼ cup (21 grams) baking soda, and ¼ cup vinegar (60 milliliters) in a tall cup or small bowl. Let the solution sit for 20 minutes, then use a small spoon to apply the mixture to the grout. Using a toothbrush or scouring pad, scrub the grout until clean. Once you’re finished, mop the grout or use a damp cloth to wipe the grime away.

How Choosing and Applying Your Cleaner?

Try water alone for mild mildew. If you clean regularly, mildew is probably mild. A small film of mildew covering grout does not require special cleaners. For this mildew, stick to simply scrubbing water between the tiles. This should be enough to get rid of unwanted mildew. If mildew does not come out with water alone, you may need a stronger cleaner.

Use bleach for intense build up. Mildew that is built up over time requires a cleaner. Bleach is the best course of action to remove mildew. You can buy bleach online or at a local department store. As bleach is dangerous if ingested, make sure to store it in a safe place away from children and pets. Wear gloves when handling bleach. Mix your cleaning solution. In a bucket, mix three parts water with one part bleach.

The precise amount of bleach and water you need depends on how much mildew you’re cleaning. Make sure to mix bleach in a well-ventilated area. Spritz on your solution. Place your bleach solution is a spray bottle. Spritz a liberal amount of the solution over tiles, focusing on where you see built up mildew. Let the solution sit for about 15 minutes before continuing with the cleaning process.

Use an ammonia solution. Mix 3.5 cups (828 milliliters) hot water, ¼ cup (21 grams) baking soda, 1/3 cup (80 milliliters) ammonia, and ¼ cup (60 milliliters) vinegar. Pour the mixture into a spray bottle. Wait 60 minutes, then spray the grout you wish to clean. Use a scouring sponge to remove the dirt from the grout. Wipe the grime away with a damp rag.

How to Clean Bathroom Grout?

Grout is wonderful for keeping tiles and appliances in place and preventing water from getting where it shouldn’t be, but it can also be a pain to clean, and it requires time and effort to keep grout free of mold and mildew. Grout is porous, so not only does it stain easily, it can also trap dirt, grime, and soap scum. The important thing to remember when it comes to cleaning grout is that you should always start with the mildest cleaning product and only work your way up to harsher cleaners if necessary.


This may mean some extra time, but it could help preserve the life of your grout for another couple years, as some harsh cleaners can damage grout. There are quite a few products and methods you can try, but as always, the best way to keep grout clean is to prevent it from getting dirty or moldy in the first place.


You should never mix vinegar and hydrogen peroxide, so clean the area well and wait a couple days before trying this method. If the hydrogen peroxide doesn’t remove all the dirt and grime, it will at least improve the appearance of the grout by removing stains, and will kill any mold that’s present.


Give borax and lemon juice a try. In a small bowl, mix together ¼ cup (63 g) borax, ½ teaspoon (3 ml) lemon oil, and enough liquid soap (such as Castile soap) to make a paste. Use your toothbrush to scrub the paste into the grout, and then rinse with warm water.


Pour a small amount of grout colorant into a container. Dip a clean toothbrush or grout brush into the color and apply it to the grout using even, back and forth strokes. Remove the excess with a paper towel, and allow to dry as per the manufacturer’s instructions.

How Bathroom Grout Keeping Grout Clean?


Wipe it with alcohol. One of the easiest ways to prevent grout from getting dirty is to clean it often with something that will prevent mold and mildew from forming in the first place. One such substance is alcohol. Once a week, wipe the grout down with isopropyl (rubbing) alcohol using a clean cloth.


Spray it with a mold inhibitor. There are several spray solutions you can make yourself using a clean spray bottle, including vinegar and water, tea tree oil and water, and hydrogen peroxide. Two to three times a week, spray the grout after a bath or shower with a solution of: Half-and-half vinegar and water. However, be aware that overuse of vinegar on grout can cause erosion over many years.


Water and 15 to 20 drops of tea tree oil. Shake well before each use. Pure hydrogen peroxide in a spray bottle. Dry the grout after every use. Removing the excess water from tiles and grout after a shower or bath is one of the easiest ways to keep grout looking new. After each use, wipe the shower walls or bath down with an old towel or squeegee.


Keep the bathroom dry. Another great way to keep mold and mildew from growing in your bathroom is by removing the water that allows it to grow. If your bathroom isn’t equipped with an exhaust fan, remove moisture from the air after every shower or bath by opening the window and blowing a stand-up fan out the window.


Seal the grout. Grout should be re-sealed every few years. Sealant can be applied to the grout lines with a paint brush. Allow it to dry, and then remove sealant from the tiles by wiping them in a diagonal direction with a damp cloth or sponge. One applied and cleaned, allow the sealant to cure for about three to four hour.

How Cleaning Bathroom Grout With Stronger Products?


Try oxygen bleach products. This is another name for sodium percarbonate, which is a compound made of hydrogen peroxide and soda crystals.Brand-name products include Clorox, OxiClean, Oxi Magic, and Bio Kleen. Mix the product with water as per the manufacturer’s instructions. Apply to the affected area and let it sit for up to an hour before scrubbing and rinsing.


Be sure to use these products in a well-ventilated area, and avoid contact with your skin. Always wear gloves to use these products. Always spot test commercial products in a small area on your grout to make sure the product won’t discolor, erode, or damage your grout. Don’t use any sort of bleach product on colored grout.


Use a commercial grout cleaner and whitener. There are many cleaners out there that are designed specifically for grout, and most of them can be purchased at hardware stores. Be sure to always follow the manufacturer’s instructions for use, and follow all the safety precautions. Commercial grout cleaners include: Zep, Goo Gone Grout, Outrageous, Tilex Tile and Grout.


Beware of chemical combinations. In case you find one chemical hasn’t worked and you want to try another, be sure to wash the area and wait a couple days before trying something new. Just like hydrogen peroxide and vinegar can combine to form peracetic acid, so too can commercial cleansers mix to form poisonous gasses, caustic liquids, and noxious fumes.


Stain the grout as a last resort. For dirt and stains that just won’t come clean from your grout, there are colorants you can apply to cover the stains and make your grout look like new. The area should be nice and clean, but if not give it a once over with your favorite cleaner and let the area dry overnight.

How cutting a tile with the tile nippers?


Smooth the cuts with a tile file and wipe the tiles down. Once you’ve finished cutting a tile with the tile nippers, use the tile file to sand down any rough edges along the cut. Follow this up with a damp cloth to wipe away any dust. After this, dry-fit the tile to make sure it rests snugly along the toilet base. If it doesn’t, keep nipping, or get a new tile and start again if necessary.


When all the tiles have been cut, filed, cleaned, and dry-fitted, you can move on to setting them in place permanently. Trace the outline of the flange onto the sheet(s) of paper. First, run your finger along the outline of the flange to create a crease in the paper. Then, lift up each sheet and use a pencil to trace an outline that’s slightly—about 0.25 in (0.64 cm)— larger than the creased outline.


The tracing doesn’t need to be perfect, because the toilet will rest on top of the flange and the cut tile(s) and hide any minor errors. If you have a removable flange and want it to rest on top of the tiles instead of on the subfloor, make the pencil tracing about 0.5 in (1.3 cm) smaller than your crease outline instead. That way, the outer rim of the flange will rest on the surrounding tiles.


Cut out the flange circle and trace it onto the tile(s). Use scissors to cut the sheet(s) of paper to the correct shape, then tape the sheets onto the tiles. Transfer the cut lines onto the tiles with a pencil, then remove the paper. Don’t discard the paper yet—you’ll need it again if you break a tile while cutting it!


Don’t try to cut more than about 0.125 in (0.32 cm) deep with any single pass, or the tile will probably break in a random spot and you’ll have to start over. Be as precise as possible but remember that the circle you cut doesn’t need to be perfect. The actual cut line will be covered by the toilet base.