How to Protect Bathroom Grout?

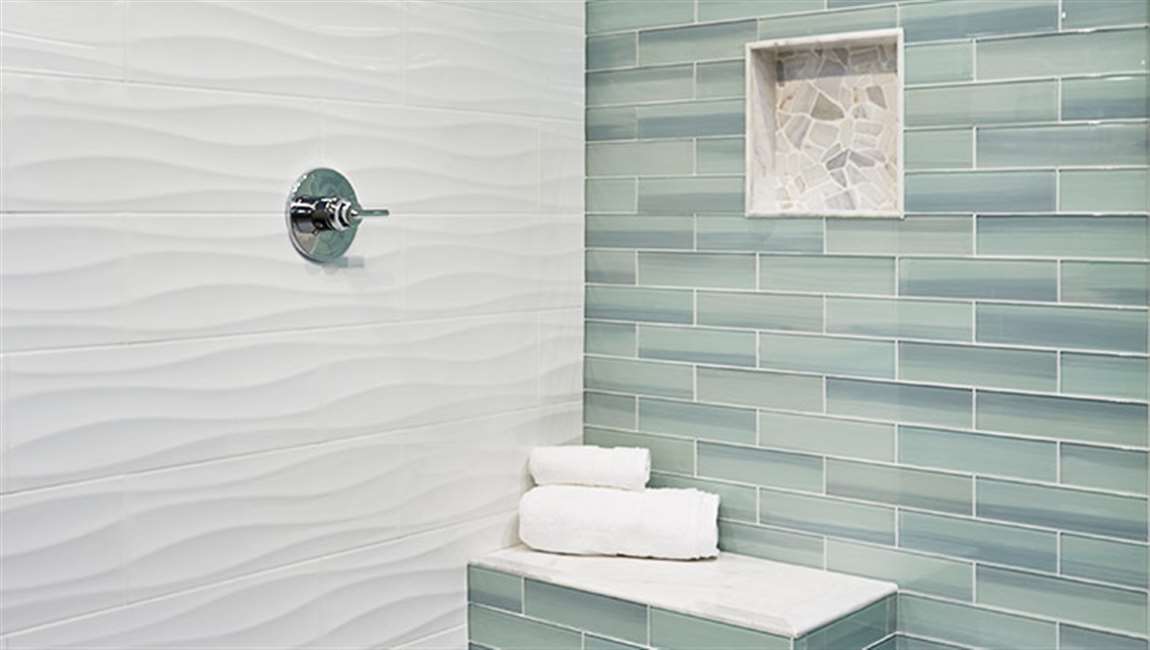
Bathroom grout is usually made of sand, cement and water. Although it is traditionally white, it is now made and sold in a number of colors. Grout adheres your bathroom tile to the walls, floors or ceilings. It also absorbs water, mold and mildew because it is a porous material. In order to protect bathroom grout from discoloration and bacteria, it is essential to clean, dry and seal the grout regularly. Read more to find out how to protect bathroom grout.

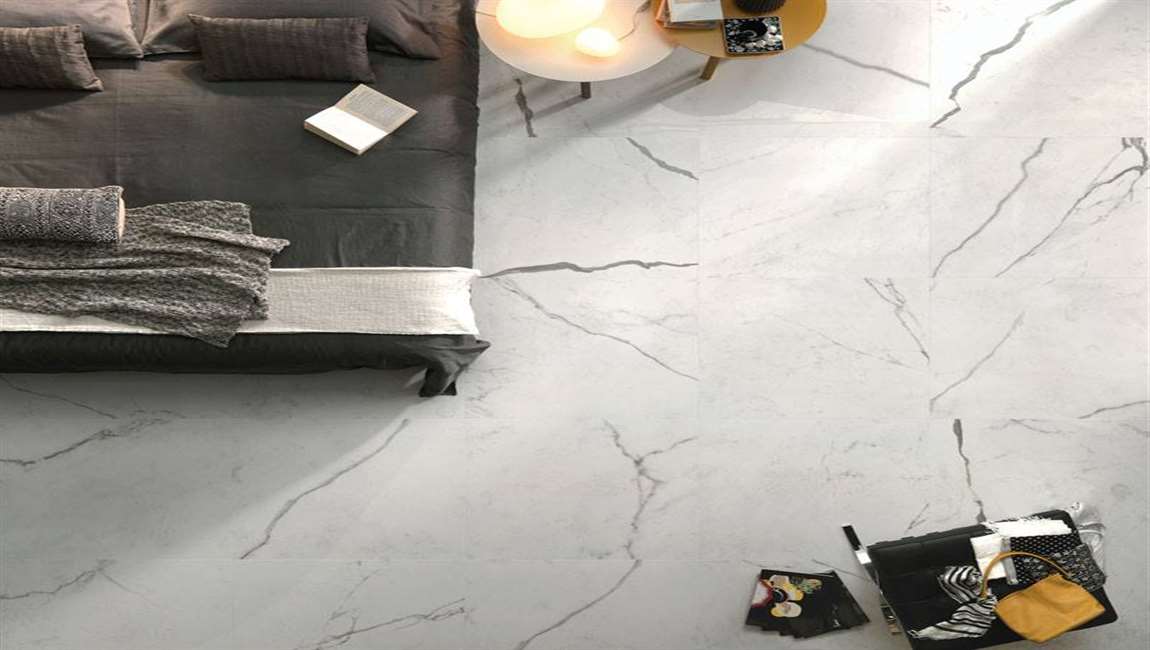
Dry your bathroom after every shower or cleaning. Use a squeegee, towel or cloth to dry all marble tiles after they get wet. Make sure you have a bathroom fan or window that can suck the excess moisture out from the air. If you do not do this, grout will absorb excess moisture, which will turn into mold and mildew. It will stain and breakdown the structure of the grout, causing it to crumble prematurely. In extreme cases, the water and mold can get behind the grout and into the floor tiles.

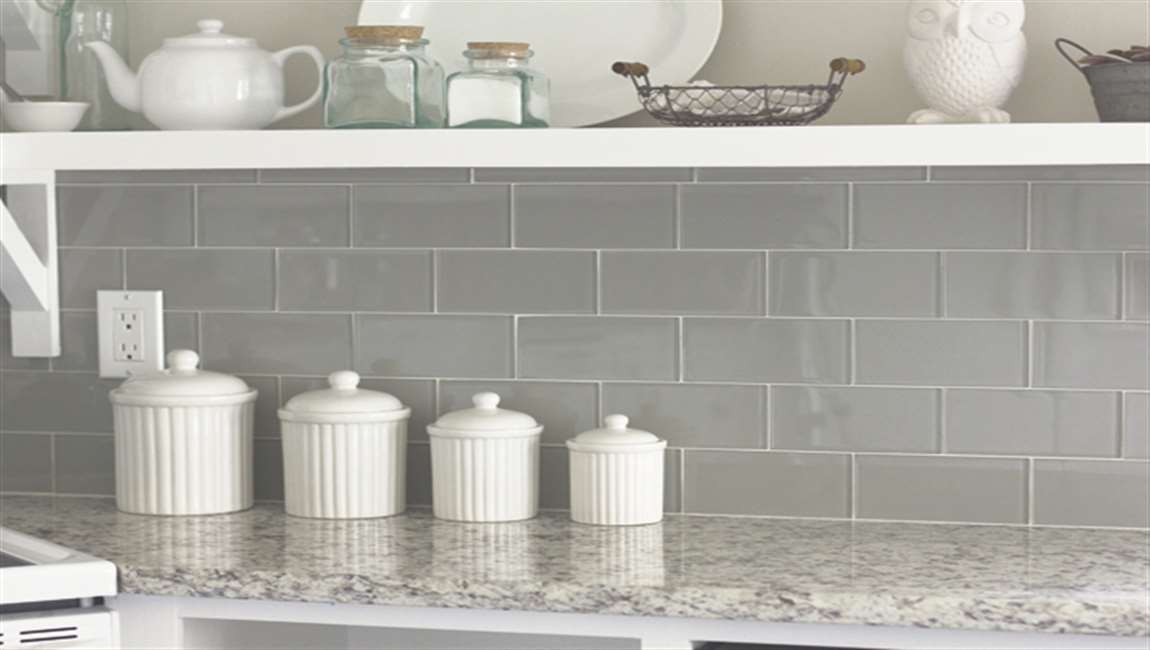
Clean bathroom tile and grout weekly with a pH neutral cleaner. Many multipurpose surface cleaners are pH neutral, so check on the bottle before you buy and use it. A neutral cleaner means that the pH, or “potential of hydrogen” is not acidic or alkali. The potential of hydrogen is judged on a scale of 0 to 14, with 0 to 6.9 being acidic, 7 being neutral, and 7.1 to 14 being alkali. Water is also neutral, at a pH level of 7.

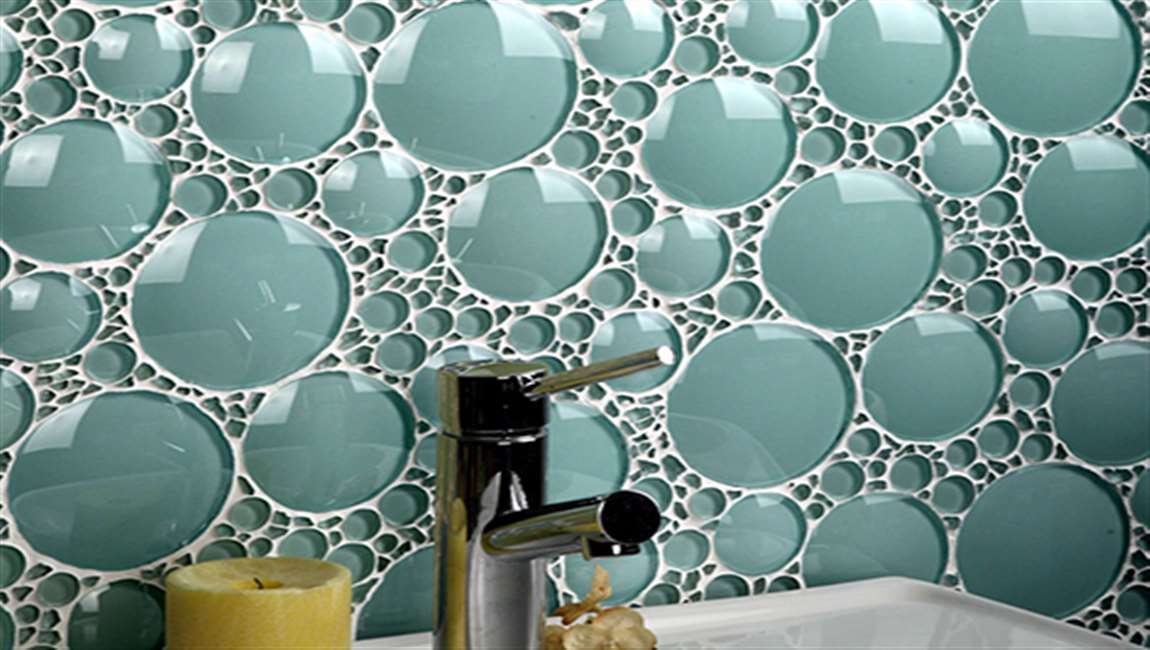
Clean the rustic tile and grout occasionally with a mild alkali cleaner. The frequency of deep cleaning grout depends upon the amount of traffic the bathroom gets. Deep clean every month, if it is heavily used, with 1 of the 2 methods below.

Mix 1/2 cup of powdered oxygen bleach into a gallon of water. Use a spoon to stir it until it is completely dissolved. Pour the mixture all over your dry bathroom grout. Reapply after the solution soaks into the grout, or about every 15 minutes for vertical surfaces. After 30 minutes scrub the tile and grout with a nylon brush, or a toothbrush for an extra thorough cleaning. Rinse well with warm water and dry with a towel or squeegee. The more you reapply the oxygen bleach on your wall tile and scrub it, the cleaner your grout will become.

How to Lay a Porcelain Tile Exterior Patio?

When thinking about using porcelain tiles design outdoors there are a number of important considerations to take into account. Firstly, and very importantly, porcelain tiles have different grades and you will need to check that your chosen tiles are Grade 5 i.e. suitable for outdoor use. Check with the supplier or manufacturer if you are unsure and double check that they are suitable for extremes of weather if that is relevant to where you live.

Use a bonded cement/sand screed to level the concrete substrate if necessary. To avoid problems with the screed shrinking (and causing the spots tiles to crack), allow it to dry out for 1 to 2 weeks. For minor surface irregularities simply use a levelling compound.


Ensure the surface that you are laying the porcelain tiles on is as level as possible, clean and dry, and remove any loose particles. Select a “thin bed” adhesive for very flat surfaces with level differences of no more than 6mm. Otherwise select a “thick bed” adhesive. Always press the porcelain tiles firmly in place to avoid any air pockets forming underneath.

Remove any excess adhesive from the wall tiles design surface immediately as it is difficult to clean off once dry. Allow the adhesive to dry for at least a day (longer in very cold weather) and protect from rain during the drying period if necessary.

Once the adhesive is dry you can then apply the grout between the wood tiles; the type you choose is important because some grouts are only suitable for narrow joints but others for wide joints up to 20mm. Press the grouting well down into the joints so that no air pockets are created and remove the excess with a damp cloth. Again, leave to dry for at least a day, covering if it starts to rain.

The Knowledge of Tile Installation Mistakes?

Create a strong bond. Since the surface of glass is very smooth, it’s important that the setting materials have a strong bond. Materials with a high polymer content have a high bond strength, ensuring that the glass maintains its spot in the installation.

Flip the tile so it’s face-up and guide it slowly through the saw. Make sure the finished side of your wall tiles design is face up for the remainder of your cut. Start from the side of your mark that hasn’t been cut yet. Slowly push the kitchen tile forward to feed it through the saw. Once the tile is cut, turn your saw off before removing the tile from your work surface. If you’re cutting a narrow piece of tile, use a wooden guide to hold the element tile from the other side. This way, the smaller piece won’t break or kick back.

Another installation concern is the glass-making method: small, boutique glass tile makers may not manufacture their products to meet industry standards due to surface treatments or wood marble tile backings. Metallic and painted backings will not bond well to cement-based mortars and may come loose. Similarly, mesh backing can trap water beneath the rustic tile, weakening the bond or creating mold. Make sure to create a mock-up to test the tile installation materials before proceeding with the full-scale project.

Protect glass tile installations from temperature variance. Glass tile installations occasionally fail as a result of exposure to sunlight or other forms of heat. Glass tile and cement setting materials expand and absorb heat at different rates, which can lead to cracks in the finished surface. Once again, the polymers in the mortar will help to absorb some movement, but silicone caulk should also be used to create movement joints that can handle the flexing tiles.

How to Avoid Common Glass Tile Installation Mistakes?

Homeowners and interior design professional who want a fashion-forward, fresh look select glass tile accents more frequently than ever. Glass tile harmonizes with either traditional, transitional or contemporary architecture, adding a splash of style. For years, glass tile was only used for accent and trim pieces, with ceramic tile filling the field; there was not much thought given to the installation materials, which were generally the same as those used for the ceramic tile. Modern design trends continue to push the envelope with glass tile, moving beyond the traditional accent pieces – glass tile is now being used as field tile with sizes 12″ x 12″ or larger, and with these new marble tiles come new challenges.

Ensure color consistency behind glass tile. Since glass can be the sole material in an installation, it is essential to choose a bonding mortar that meets its unique demands. In most cases, the color of the thin-set mortar was not an issue when installing opaque ceramic tile. But with clear and translucent glass, the mortar appears through the tile: if the color varies in the mortar, it will in the glass tile too.

To eliminate variations across a glass tile installation, choose a glass tile mortar with a bright white shade that is controlled to a consistent standard color. The color consistency will ensure a uniform appearance on the face of the glass tile, even in large installations that require multiple batches of mortar. As an added bonus, the bright white shade of the mortar can enhance the color of the clear or translucent glass tile.

Eliminate mortar voids. A typical ceramic tile installation involves spreading a thin-set mortar on the surface with a notched trowel, then pressing the ceramic tile into the mortar to collapse the ridges and improve contact between the tile and mortar. Unfortunately, this practice can leave many voids in the mortar behind the tile. While this would not be a concern with opaque ceramic tile, the randomly distributed air pockets or voids may be visible through clear or translucent glass.

The mortar should still be spread with a notched trowel onto the substrate, but it should also be spread (back-buttered) in an even, thin film onto the back of the glass tile. Now, when the two mortared surfaces are pressed together, the back of the tile is already covered, so any remaining voids from the mortar ridges are hidden and do not show through the glass tile. Keep in mind that standard thin-set mortars can shrink and pull away from the tile, causing voids and air bubbles during the curing process, so make sure that the mortar resists shrinkage too.

How to Cutting Curves with an Angle Grinder Before Cut Marble Tiles?

Marble tiles look great in a bathroom or kitchen, but sometimes you may need a smaller piece of tile to fill in a gap. While ceramic tiles can be scored and snapped, marble needs to be cut completely or else it will shatter. You can use either a wet saw to make straight lines or an angle grinder to make curves as long as you have a diamond blade. Once you make your cuts, you can make marble tiles any size you need.

Change the blade on your grinder to a diamond blade. Loosen the nut attaching the blade to your grinder using a ratchet wrench. Remove the current blade, and set the diamond blade in its place. Put the nut back onto the blade and tighten it again with your wrench. Check your grinder’s rotation in the instruction manual and compare it to which direction the arrow faces on your blade. If they go in opposite directions, install the blade upside-down so it cuts the right way.

Place a 2 in (5.1 cm) piece of scrap wood or foam underneath the wood tile. Find a flat piece of plywood or stiff foam that you can put underneath your tile. Make sure the wood or foam is at least 2 inches (5.1 cm) thick. That way, your angle grinder won’t cut into your work surface.

In a pinch, clamp multiple pieces of cardboard together to make a new cutting surface. Warning: Don’t hang your cement tile over the edge of your work surface since it’s more likely to break or shatter.

Cut halfway through the tile design for its entire length. Turn your angle grinder on with the switch on the main body. Carefully lower the blade of the grinder onto your kitchen tile in a slow and steady motion. Push the grinder halfway through the wood marble tile and follow along with your line for the entire length. When you finish your cut, turn off the grinder.

Keep your fingers clear from your blade so you don’t accidentally cut yourself. Don’t attempt to cut through the entire tile right away since it may create sparks or break your blade. Follow along with the line again to cut through the wall tiles design completely. Turn on your grinder again and start from one side of your cut line. This time, push the grinder through the rest of the element tile so it cuts through it completely. Push the grinder slowly in a straight line so it doesn’t jump out of the cut.

How to Making Straight Cuts with a Wet Saw Before Cut Marble Tiles?

Install the diamond blade on your saw. Tip the wet saw on its side and unscrew the nut holding the blade in place. Lift the current saw blade out from the machine carefully so you don’t cut your hand. Insert your diamond blade so the teeth face in the cutting direction before securing it in place with the nut again. Use a socket wrench to tighten the nut completely.

How you change the saw blade and the direction it spins depends on the model of wet saw that you have. Consult the instruction manual to learn how to properly install the blade. Tip: Some saws come with a blade wrench you can use to tighten the nut. If your saw doesn’t have one, a ratchet wrench will work.

Fill the reservoir on the bottom of the machine with cold, clean water. Water in a wet saw helps cool down the blade and reduces the amount of dust. Locate the tray on the bottom of your wet saw for the water reservoir. Fill the reservoir with water until the bottom of the blade is slightly submerged.

Wet saws kick up water while you use them, so you may need to refill the reservoir if you plan on cutting multiple spots tiles. Since you’re working electronics and water, plug the saw into a GFCI outlet. GFCI outlets will automatically turn off the power if any of the electronic components in your saw get wet.

Adjust the fence on the saw to keep your cut straight. The fence is the straightedge piece that attaches to the base of your wet saw. Hold the marble tile that you’re cutting against the edge of the fence to see where it lines up with your saw. Adjust the fence closer or further from the blade until your mark lines up with the saw. Saw blades usually cut out 1⁄8 inch (0.32 cm) from your material, so make sure your blade is on the scrap side of your line.

How to Choosing a Blade and Taking Safety Precautions Before Cut Marble Tiles?

Pick a diamond blade for your saw or angle grinder. Diamond blades have a harder cutting edge, making it easier for them to grind through tough materials like stone or marble tile. Purchase a blade for a wet saw or an angle grinder depending on what you plan on using.

Look for diamond blades at your local hardware store or online. The size of your blade depends on the model of your machine. Check with the instruction manual to see what size blade it requires.

Mark the line you’re cutting on the casstle tile with a pencil. Set a straightedge on top of your tile and trace along the edge with a pencil to mark it. The mark won’t wash off when you use a wet saw, and it can easily be rubbed off the spots tile when you’re finished. If you’re making a curved cut, use a compass to trace a perfect circle.

Tip: If you don’t want to mark your calacata tile directly, place a straight piece of masking tape on the tile and use a marker to draw your line on it. It’s okay to cut through the tape.

Wear safety glasses, earplugs, and a respirator. Cutting through marble tile kicks up a lot of dust, so protect your eyes, nose, and mouth. Since using the saw or angle grinder will be loud, put in earplugs so you don’t damage your hearing. Most hardware stores should carry all of the safety equipment you need. You may wear work gloves if you want, but they’re not necessary.

How to Installing New Pool Tiles?

Mix up a batch of swimming pool thinset repair mortar. Follow the instructions on the packaging to measure and mix the mortar and water. Use a trowel to stir the mixture in a plastic container or metal bowl. Keep adjusting the proportions as needed until the mixture reaches a spreadable, peanut butter-like consistency. Stir well to get rid of any lumps.

The thick, spreadable consistency will help keep the mortar from dripping into the pool water. Some thinset mortars also come with a bonding agent, which increases the adhesive quality. Mix equal parts mortar and bonding agent, then add water until the mixture thickens to a creamy, spreadable texture.

Spread a 1⁄8 inch (0.32 cm) layer of thinset on the back of the new pool tile. With your trowel, scoop up a daub of thinset and smooth it out over the entire back of the swimming pool tile, all the way up to the edges. Line the tile up on the pool wall so it matches any existing pattern, then press it firmly against the beam. Thinset dries quickly, so make sure to place the marble tile immediately after covering the back.

Keep the marble tiles in place while they dry for 24-48 hours. Check on the tiles’ progress every 10 minutes for 1-2 hours to see if they’ve slipped down the pool wall. If any small tiles slip, simply slide them back up and press them into place. For larger onliy tiles, you should duct tape them into place while they dry. 24 hours should be enough to dry the thinset mortar, but waiting up to 48 hours will let it cure and harden even more.

Use waterproof mosaic tile grout to fill in the spaces between the wood tiles. Load up a flexible spreader with grout and push the product between the tiles. Once you’ve filled up the space, let the grout set for 10-15 minutes, then use wet your hands and gently rub at any excess grout smeared on the tiles.

To avoid dropping any daubs of grout into the pool, work with small amounts at a time. If the dried-on grout is stubborn, wait 24 hours and scrub the tiles with a stiff brush to polish and remove any haze. After letting the grout dry for 24 hours, you can refill the pool and enjoy the product of your hard work.

How to Finding Replacement Pool Tiles?

If your swimming pool is over 15 years old or has taken quite a bit of wear and tear, you may need to replace some of the tiles. Start by lowering your water level and removing any cracked or damaged tiles. Find some replacement pool tiles design and install them with thinset mortar, then seal them in place with grout. Once you’re done and everything’s dry, bring the pool’s level back up and reward yourself with a swim.

Use the old tiles if they’re still intact. If the cement tiles came off but they’re still in 1 piece, you can simply re-attach them! This will save you a lot of time, instead of trying to find new tiles that fit the pattern or space available. When the bathroom tiles fall off, keep them together in a safe spot where they won’t get bumped, cracked, or lost.

Ask your original pool builder for glazed rustic tile, if possible. If you know who built your pool and they’re still available, they may still have extra tiles handy. Send them an email, including a picture of the tile and a quick description, and ask if they have access to any extra marble tiles. You’ll also need to ask for a price, which may be discounted due to your past business.

Check online or at local pool stores for similar or identical tiles. Pool stores are good for comparing colors up close, but online pool tile catalogues will likely give you the most variety to choose from. Settle for a close match if the repair is in a less obvious area, such as somewhere you can’t see from the house. As long as the color is the same and the shape and size are similar, they probably won’t stand out too much.

Have tiles custom-made to match your original tiles exactly. This option is more expensive, but if you can’t find a match for your tiles, this will give you the most seamless repair. Consult with a custom rustic tile company to see if they can recreate your tile. Bring photographs of the original  common marble tile to give them a reference. To find a custom tile company, look online or locally and set up a consultation.

How to Removing Cracked or Damaged Tiles Before Replace Pool Tiles?

Drain your pool below the tiles that need replacing and let the area dry. Use a submersible pump to drain out enough water to leave the damaged area exposed and dry. Once the area is clear, turn off the pump and let the calacata tile dry off completely. It’s best to do this in bright sunlight, which will dry the tile quickly.

If you’re only replacing a couple stone tiles along a top edge, you’ll only need to drain enough water to expose the area and keep it from being splashed. If you’re redoing your entire pool, drain all of the water and let it sit for a day or 2, until it’s fully dry. There are also special adhesives available for re-attaching single marble tiles underwater. However, your repair will be much more effective and durable if you drain your pool first.

Use a grout saw to remove the grout around any cracked mosaic tiles. This tool essentially looks like a screwdriver with a saw blade on the end of it. Push the blade end against the grout and saw it back and forth to cut through the grout. Keep cutting through until you remove all of the grout around the tiles that need to be replaced.

Use a hammer and chisel to remove any damaged tiles. Place the tip of the chisel in the joint of the cracked tile, then tap it with the head of the hammer to break the tile away from the mortar. Keep tapping until the whole pool tile design comes away, then repeat on any other damaged cement tiles. If your tiles are small, you can use a small flathead screwdriver instead of a chisel.

Inspect the beam behind the polished tile for any necessary repairs. Look for cracks, open seams, an uneven surface, or missing chunks in the beam. If the damage is greater than some damaged tiles, you’ll need to shore up the base with hydraulic cement or a plaster mix. This is essential for ensuring the longevity of your pool as well as creating a flat surface for the pool tile to stick to.

If the damage looks like it could be extensive, contact a professional full-service pool company to help diagnose and repair the problem.