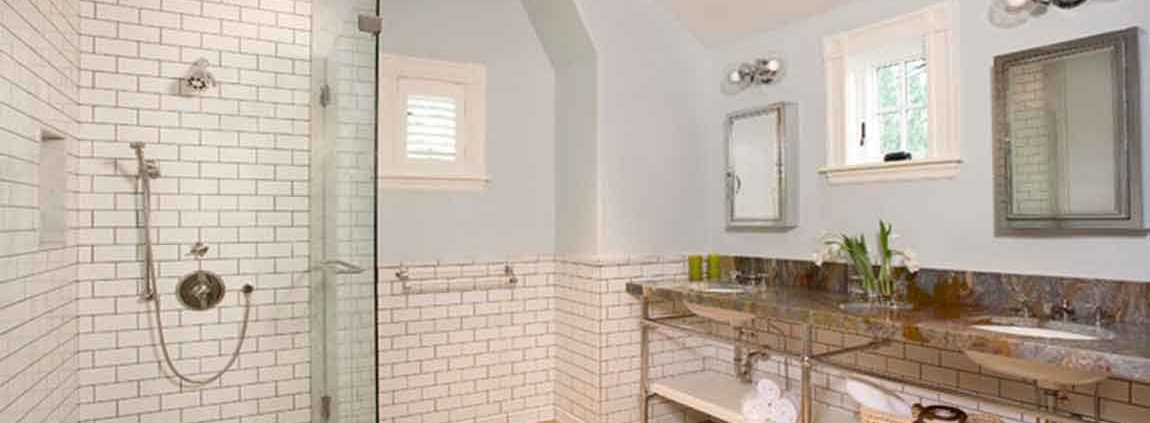
How Dry-Fitting the Tiles?

Arrange the tiles outward from the center of the room. To get started, place a tile at each of the 4 corners where the wall lines intersect. Beginning at the center of the room rather than at the walls will prevent you from ending up with gaps or unsightly narrow tiles around the outer perimeter of the room. Symmetrical central tiles will also serve as an attractive focal point for the room.

Use spacers to separate each tile. After you lay down a tile, place a tile spacer at either end before putting down the next tile in the row. The spacers will ensure that your layout remains neat and even and that no 2 tiles are set too close together. Spacers also serve to show the minimum distance you’ll need to leave between each tile for your grout lines.

Tile spacers come in many different sizes. The amount of space you leave between tiles will depend on the look you’re trying to achieve, but 1⁄8 in (0.32 cm) spacers are standard for most flooring projects. Work your way toward the wall. Starting from the 4 central tiles, lay out the remaining tiles in a straight line until you reach the wall. Then, return to the center and work your way toward the opposite wall to form a single row.

Lay your tile in 2–3 ft (0.61–0.91 m) sections. The optimum size of each section will vary based on the dimensions of your tile. If you’re working with 12 in (30 cm) square tiles, your section groupings might be comprised of 2-3 tiles in each direction (for a total of 4-6 tiles per section).

If you need a visual aid to help you keep track of your sections, snap a series of chalk lines to clearly mark where each next group of tiles should go. Dry-fitting your tile in sections usually results in straighter, more precise grout lines. Be sure to complete 1 row before moving on to the next.

Bathroom Decorate Knowledge


Use small shims or other spacers to allow a small amount of space between the bottom of the tile and the lip of the shower pan. Small pieces of cardboard work great as makeshift shims. After the mortar is set, you can simply remove these shims and caulk between the lip of the pan and the bottom of the tile.

Continue laying the tile, making sure to use spacers in between tiles. Spacers will leave you identifiable grout lines between tiles. Small 1/16″ or 1/8″ spacers (or even bigger) can be placed at several places on the x- and y-axis of the tile to leave adequate space for an even grout line.

Repeat the procedure, setting each row of tile on top of the last row of tile. Continue until you reach the top of the shower stall. Measure up from top of the last row. Mark the line with a level as a guide for your next row. Spread thin-set onto your tiles with v-notched trowel and place the tile just below the marked line. Use spacers all around.

Make sure to measure every third or fourth row to ensure that you have an even grout line. Let the tile set for 48 hours. This will make sure that the mortar has adhered properly to both the tile backing and the cement board backer. Do not use tile nippers made from slate. You can use them on ceramic tiles, however. You can also use a wet saw to make basic cuts on most tiles.

Cut the tiles while they are still on the mesh. Using your sketched line as a guide, cut the tiles down to the right size. A wet saw should do the trick for most tiles. If the tiles are smaller than 1 or 2 inches (2.5 or 5.1 cm), a pair of tile nippers may work better. The tiles should fall away from their mesh backing as you cut them. If they don’t. cut them away with your box cutter.

How to Cut Tile Backsplash?

Installing a tile backsplash yourself is a great way to save money while getting the exact look you want. There is more to installing backsplashes than just arranging tiles, however; you have to measure and cut the tiles so that they fit properly. If the backsplash is already installed, you may still be able to cut holes into it for new fixtures, as long as you use the proper tools.

Use tile nippers for small tiles. Tiles that are smaller than 1 or 2 inches (2.5 or 5.1 cm) may be difficult to cut on a score-and-snap tile cutter. Not only could you hurt yourself, but you could break the tile. Instead, use a pair of tile nippers to pinch the tile where you need to break it. You can use tile nippers on larger tiles to “cut” curves.

Use a wet saw to notch tiles, if needed. Sometimes, the corner of a cabinet or outlet cover will extend into your backsplash tiles. Measure the corner, then trace it onto the tile with a pencil or marker. Place the tile onto the sliding table of the wet saw. Gently guide the tile into the saw to make the first cut. Pull the tile back, then create the second cut. Use a tile nipper to break off the piece between the 2 cuts.

Install the tile sheet using your preferred tile cement. Spread the tile cement across the backsplash area, then press the tile sheet into place. If you cut your tile sheet smaller, arrange it so that the gaps caused by the size difference are along the top edge, where the cabinets are. If there is a gap along 1 of the side edges, position the sheet so that the gap is in a corner.

Measure the excess tiles against the gaps. You should still have some tile sheeting left over from when you cut the tile sheet down. Take these excess tiles, and measure them against the gaps. If you need to, mark the back of each time with a pencil or marker to figure out how much you need to trim.

How Cutting Installed Tiles?

Cover your counter and put on a mask and safety goggles. Cover your counter with plastic sheeting to protect it and make cleaning up easier. Put on a pair of safety goggles to protect your eyes against dust. Finally, put on a mask suitable for working with fine particles. Most dust masks and respirator masks come with a description of what they are used for, such as sanding dust, aerosol, etc. Choose the one for dust.

Make the tile where you wish to cut it. A pencil may work just fine on a slate or ceramic tile, but if the tile is glazed, you should switch to a marker. Try to be as precise as possible for this step. Installing a new electrical fixture will require you to get inside the wall. Mounting a towel rack does not.

Cut along the top, bottom, and side edges. If you need to get inside the wall, then you should cut through the dry wall as well. A dremel rotary cutter with a diamond tile blade will work for most tiles. If your blade can’t go around the corners, skip them for now.

Use an oscillating cutter to cut through tight corners. While a dremel rotary tool will work for most lines, it won’t work on tight corners. For that, you should switch to an oscillating cutter instead. You may have to experiment before you find the right one for your type of tile. A multi-surface blade seems to work better than a tile blade, however.

Pull the tile away. Wedge a thin knife or spatula behind the tile and pop it out. If you had to cut through the wall, try not to lose anything inside the wall. Your hole is now complete and ready to finish.

How Cutting Tile Sheets?

Measure the area of your backsplash. Use a measuring tape to measure the dimensions of your backsplash area. Write these measurements down. Don’t worry about cabinet corners that cut into the backsplash area just yet. Masks are graded based on the size of particle they filter. Purchase one that will filter dust particles.

Transfer the measurements to your tile sheet. The easiest way to do this is with long strips of painter’s tape of masking tape. You can also draw on the back of the tile sheet with a marker. Be sure to mark any outlet and light switch holes. Place the sheet against the wall and mark them, if needed.

Put on some eye and respiratory protection, if needed. A pair of safety goggles is highly recommended because it will protect your eyes against flying pieces of tile. A good respiratory mask is only needed if you will be cutting the tiles with a wet saw or grinder. If you will be using tile nippers, you won’t need a mask.

Cut the tile sheet down to size with a box cutter. Flip the tile sheet over so that you can see the back, then cut through the mesh with a box cutter or utility knife. If the tape runs across a row of tiles, cut through the mesh along the inside edge of the tape. This will make your tile sheet a little smaller than necessary, but that’s okay.

If your tiles are staggered like bricks or a honeycomb, you will need to cut around the tiles. Don’t cut straight through them. Be sure to cut through the outlet and light switch holes. If your tiles are staggered like bricks, the gaps won’t be consistent. You will need to cut some tiles larger, and other tiles smaller.

How Cutting Standard Tiles?

Lay out your tiles on the counter, table, or floor. Make sure that your tile lay out matches the dimensions of your wall. For example, if your backsplash is 6 to 2 feet (1.83 to 0.61 m), then your tile lay out should also be 6 to 2 feet (1.83 to 0.61 m). Include the tiles that will get in the way of cabinets, corners, and edges. You will cut these down to size later. Also, remember to include the grouting gaps between the tiles; use a spacer if you have to.

This step is known as “dry-fitting.” It will help you figure out whether or not you need to cut any tiles. Leave a 1⁄8-in (0.32-cm) gap around the backsplash, where it connects to the cabinets, counter, and adjacent wall. If you are working with a large sheet of tiles, click here to continue.

Mark the tiles that will get in the way of cabinets and corners. Check the dimensions of your wall against your laid-out tiles. Use a marker to make a mark across the tiles where they will bump against a cabinet or corner. Mark the tiles that will be along the top edge of your backsplash, next to a wall, or under a cabinet. They will be more disguised that way.

Put on some eye and respiratory protection. A pair of safety goggles will protect your eyes against any flying pieces of tile. A good respiratory mask will prevent you from breathing in any sanding dust. Most masks are graded based on the type of particle they can filter. Choose one that can filter dust particles.

Use a score-and-snap tile cutter on large tiles. Use the cutting wheel to make a single, deep score in the tile. Snap the tile along the scored line. If the tile has a mesh backing, make sure that the mesh side is facing up. Do not use grinders on tiles made from slate. You can use them on ceramic tiles, however.

Tile Commercial Polishing

Apply a wax stripping solution to remove any built up wax. If your tile floor has previously been waxed, you’ll want to remove it before polishing. The old wax may be flaking or collecting dirt, and will affect the overall polish. Fill your bucket with a wax stripper and scrub your tile floor clean of any old wax with a scrub brush, then mop the floor with clean water to remove any chemical residue.

Allow the floor to dry at least 1 hour before moving on, but make sure the floor is fully dry. You can find wax stripper at any home improvement or hardware store. Try hydrochloric acid for soap scum and water deposits on tile flooring. Hard water deposits and soap scum stains require heavy duty chemicals to be removed.

Empty the bucket of water completely, then fill it with 4 cups (950 mL) of water and 1⁄2 cup (120 mL) of hydrochloric acid. Apply the mixture directly to the stain and allow it to sit for several minutes. Then scrub the stain clean and allow the area to dry completely. Hydrochloric acid is available for purchase at most hardware stores. It is also often sold at pool supply stores because the acid is commonly used to sanitize swimming pools.

Hydrochloric acid is a harsh chemical and can burn your eyes and throat, so mix it in the bucket outside or a well-ventilated area. Be sure not to get any of the chemical on your skin as it can cause chemical burns. Use an electric floor buffer to buff the tile floor quickly. A floor buffer is a great option for a quick and consistent buffing. Consider renting or borrowing one for the day if you do not own one.

They are often as easy to use as a standard vacuum cleaner. Turn the buffer on and move it across the tile floor using small, sweeping side-to-side movements for an even finish. You can rent electric floor buffers from home improvement stores like Home Depot for around $30 a day.

How Using Natural Products on Tile Flooring?

Clear the tile floor of furniture and obstructions. Before you start, be sure to move any furniture that can get in the way of polishing your tile floor. Remove chairs and tables as well as rugs and mats that may be in the way. If you have tile you’d like to polish that is underneath or adjacent to appliances, you’ll need to remove them as well.

Use a baby gate or close the door to the room to keep out any pets that could walk over the tile floor while you’re cleaning it. If you have tile flooring underneath cabinets or in a pantry or closet, make sure you clear out anything that could get in the way of cleaning and polishing.


Mix 1 gallon (3.8 L) of warm water and 1⁄4 cup (59 mL) of white vinegar. Vinegar is an age old cleaning product that is much less harsh on the environment than industrial cleaning chemicals. Vinegar is also safe to use on tile and will not stain or discolor your tile flooring. Fill your bucket with warm water because warm water will help the vinegar mix and form a natural cleaning solution.


Use this vinegar solution to scrub, mop, or clean your tile floor. Sweep the tile floor to remove dirt and dust on the surface. Once the room is clear of obstructions, use a broom to sweep the floor free of large dirt particles to make it easier to polish. Mopping a dirty floor can just move the dirt around and make your tile look dingy. A good sweep before you mop is always a good idea for a clean floor.

Don’t neglect sweeping the corners of the room or beneath any cabinets. A Swiffer or dry mop works great to pick up dirt. Scrub the grout between the tile with a stiff brush or toothbrush. Focus on the grout in-between the tiles before you clean the whole floor.

How Maintaining the Tile Floor?

Vacuum or sweep your tile floor every day. The best way to maintain your tile floor’s polish and shine is to keep it clean. Sweeping and vacuuming will remove dirt and debris that can build up and cause your tile to lose its luster. Even worse, dirt that is left for a long time can get smashed into the tile and turn into grimy stains.


If you plan to mop, make sure you sweep or vacuum first. Mop the floor regularly. In addition to sweeping or vacuuming dirt and debris, it’s important to mop your tile floor to maintain its polish. This doesn’t necessarily mean dragging the bucket and soap out every other day. If your floor doesn’t require a heavy cleaning, a damp mop will be enough to keep it clean.


Keep your mop clean so you’re not spreading dirt around your tile floors when you mop. You can also use dry mops like a Swiffer for an easy clean. Clean any spills or stains quickly. To keep your tile floor polished and without any deep stains, it’s important that you clean up any spills that occur as soon as possible.


Things happen, stuff spills, but the longer a spill sits, the more it can stain and soak into your tile and grout. They can also cause your floor to be sticky, which can attract dust and dirt to adhere to your tile. Use disinfectant if necessary, but sparingly, as the chemicals can discolor tile floor.


Buff the tile floor with a microfiber cloth. Buffing your tile floor can really bring out its shine and add a smooth texture to the finish. Use a microfiber cloth and buff the floor in smooth, even circular motions. Start at one end of the room and work your way across so you don’t miss any sections. Some dry mops have microfiber pad attachments you can use as well.

How Preparing the Backsplash Surface?

Turn off the power to your kitchen. Find the electrical panel in your home. It is typically a small, metal panel painted to match your wall. Open the panel, then find the switch for the bathroom or kitchen electrical outlets (wherever you are doing the backsplash). Flick the switches to the off position. Remember to flick the switches back on after you have finished installing the tiles.


If your tiles are already on the wall and you wish to cut a hole in them, complete this step, then click here to learn how. Remove any light switch and outlet covers. Use a screwdriver to remove the screws from each cover. Place the covers into separate zippered bags along with their matching screws. Work 1 cover at a time so that you don’t mix or lose the pieces.

You will need to reinstall the light switch and outlet covers after you have finished installing the tiles. Clear and cover the counters. Move anything on the counter that might get in the way, such as coffee makers and toasters. Cover the counter with a plastic sheet to protect it. If you are installing the tiles later, it would be a good idea to mask off counters and cabinets.

This will save you a step. To mask off the counters and cabinets: lay strips of painter’s tape along any counter or cabinet edges that touch the backsplash wall. Mark the center of the wall, then draw a plumb line through it. Find the center of the backsplash wall, and make a like mark with a pencil.

Place a 2-ft (61-cm) level against the mark and orient it vertically. Use the edge of the level as a ruler to draw a vertical line spanning the height of your backsplash. The plumb line will help you lay out your tiles evenly once you go to mount them on the wall. Make sure that the level is straight. The bubble inside the glass tube should be centered between the lines.