Posts

How to Drill Ceramic Tile?

Ceramic tile is both hard and brittle, making it easy to damage both tile and drill bit. Adopt a patient approach with the correct tools, and you have a high chance of success. Hopefully, you will not have to read the included instructions for repairing cracked tile.

Diamond bits are more expensive, but can drill through extra-hard tiles. You may need these for modern porcelain tiles (made since the late 1990s), because they’re much harder than ceramic tiles. Masonry bits are made from carbide-tipped steel. These are strong enough to drill through, but their shape increases the risk of shattering porcelain and other brittle tiles.

As a last resort, use high speed steel (HSS) bits. Expect these to wear down after one or two holes. If drilling a large hole for plumbing installation, use a hole saw bit made from one of the above materials. Make sure its central pilot bit is also made from a suitable material.

Wear safety glasses. Ideally, the wood tile should not chip or break. In the event that it does, your eyes should be protected. Cover the area with masking tape. Tape over the area in an X shape, marking the site of the hole. This will help give the drill bit some traction, reducing the chance of it slipping. The tape also makes chipping less likely on the outer rim of the hole.

Tap the drill bit in lightly with a hammer. A drill bit may skip and jump around on the tile’s smooth surface, unless you make a small pilot hole to steady it. Hold the drill bit over the center of the X and tap it in with a hammer. Tap gently to avoid damage, repeating until you’ve made a small dent through the surface of the glaze. If you’re using a solid drill bit larger than 1⁄4 inch (0.6 cm), consider drilling a pilot hole with a smaller bit first.

Drill through the tile slowly. Set your drill to a low speed and apply modest pressure to the surface. Allow the drill to work slowly, rather than push hard and crack the tile. This may take three or four minutes. Applying too much pressure can cause the wall tile to blow out and crack on the backside, creating a weak spot in the tile and often a much larger hole than originally intended.

How to Clean Ceramic Tile?

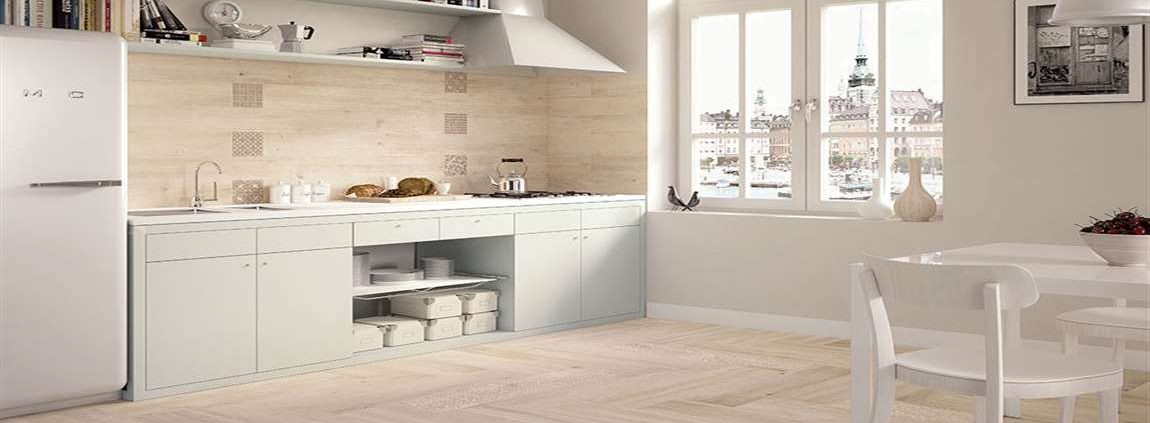
There are a number of ways to get your ceramic tile clean. Engage in regular maintenance to prevent grime and grit from collecting on your ceramic tile. Sweep (or vacuum) and mop your ceramic tile at least once each week. If your tile is stained, you should identify the specific substance or agent of the stain, then choose an appropriate remedy. If you’re facing a particularly obstinate stain on your ceramic tile, consider steam cleaning or a muriatic acid solution.

Sweep your ceramic tile regularly. Use a broom and dustpan to sweep your floor at least once each week. This will remove dust, dirt, and other grime from the tile. Alternately, you could vacuum your ceramic tiles to remove dust, dirt, and crumbs.

Mop the floor weekly. After sweeping the floor, mop it at least once each week. There’s no need to use soap (though it doesn’t hurt). This will keep your ceramic tile looking shiny and new. Once you’ve mopped the floor, wring the mop out immediately and dry the floor with it to prevent any new dirt from settling in wet areas, and to protect you from slipping.

If you use soap, use a non-toxic dish detergent. Start with a couple drops of detergent so it doesn’t become over-concentrated. Too much detergent can leave soapy residue or film on your floor tiles. Continue regular maintenance on your floors without using any strong chemicals. Over time, chemicals can degrade the quality of your wood tiles.

Use a doormat. If you’re trying to protect ceramic tile located directly inside the foyer, place a doormat outside the door of your residence. Additionally, place a rug or another mat right inside the house. Encourage family members and visitors to wipe their feet on both mats, and to remove their shoes when they enter the home. Use of doormats is especially important during rainy and snowy seasons.

How Spreading the Grout?

Pick a 3 ft × 3 ft (0.91 m × 0.91 m) section. After you’ve set up, don’t just start grouting the entire wall. First, divide the wall up into manageable sections that are about 3 ft × 3 ft (0.91 m × 0.91 m). This way, you’ll be able to finish one section before the grout completely dries. When you’re done, you can move on to another section. Use painter’s tape to mark out your sections.

Spread grout over the tiles. Tip the bucket forward a little. Flip your float upside down. Then, slide it under the top of the grout and scoop some up. Spread the grout in an up-and-down fashion over the Wood Marble tiles. Do this until your entire 9 square foot (.84 square meter) section has a thin layer of grout on it. Use a plastic drywall knife if you’re working in a small area, such as when adding a backsplash in a kitchen.

Float more grout in a diagonal fashion. Position your float at a 45-degree angle to the only tiles and spread your grout liberally into the joints. The joints are the spaces between your Calacata tiles. Push as much grout into the joints as possible. Add more grout until you are confident the joints are filled. As you spread the grout into the joints, use the side or corner of the float to compress it. Avoid filling joints that are between Bara tile and another surface, like a bathtub. You’ll caulk these areas later.

Hold the float at 90 degrees and remove excess grout. After you’ve filled and compressed the grout in the joints, use your float to remove excess grout. You can do this by making quick passes over the Ceramic tiles and scraping up as much grout as possible. Don’t spend too much time removing the grout. Just get as much as you can. Use a serpentine motion (across, up, back, up, and across) to quickly cover as much of the New Slate tile as possible.

Use the rounded corner of your float to shape your grout joints. After you’ve filled the joints, take the rounded corner of your float and run it over them. Try to create a slightly concave shape (a slight curve inward) in the grout. In addition, this will have the effect of compacting your grout and helping you remove the excess. If your float doesn’t have a rounded edge, you can use another tool or object. For example, you can use a toothbrush handle. Don’t use a metal tool. This could damage the New Sand Stone tile.

How to Remove Grout and Cement Spots off Ceramic Tiles?

Have you got extra grout marks or cement tile adhesive spots on your recently renovated bathroom? If so try these tips for removing them. If it is a just a few spots and your floor tiles have a good hard surface that won’t scratch easily, cleaning  tiles design like this should be easy.

Assemble cleaning tools. For the first steps, you only need a steel scourer pad and something to scrape with, such as a screwdriver. For harder stains, you will need to resort to a professional response using acid. See “Things You’ll Need”. Try rubbing the ceramic tiles with a stainless steel scourer pad. Scrape off. If you still have a few larger lumps try scraping with a blunt screwdriver to get the worst off and then the scourer.

Try intermediate measures if the above steps don’t do the job. A grout haze remover may be of use. You can find this at a home store or tile shop. Follow the instructions on the container. You can use the stainless steel scouring pad as above, or you may try a man made scouring pad.

Try advanced measures if the above steps don’t do the job. If you have a lot of hard grout or Vatican tile adhesive on them, cleaning Element tiles like this calls for extreme measures. Tilers use diluted Hydrochloric acid as a last resort; it is also known as Muriatic acid. This acid eats at the cement base of the product you are trying to shift. It is important to read the warnings in detail before proceeding – cleaning Windstone tiles with acid must to be done in a responsible way:

Use a very small spot at a time and observe how it goes. This is important, as doing a small section at a time, you will be working safely and in control. Use a small bristle brush and dab a spot on at a time. When the bubbling stops wash it off with water, and try the spot with your scourer again and with a bit of luck it will come off easily. Repeat the process as needed. Wash clean and wash again, get rid of all traces of the acid.

How to Using Vinegar and Ammonia to Clean Ceramic Tile Grout?

Do a preliminary clean. Before you get down to the deep cleaning methods, it is necessary to do a regular clean up of your floor tile. Follow your regular cleaning process of wiping down counters or sweeping and mopping floors. This will get all the top layer of scum off, and make your work a bit easier.


Create your solution. In a bucket or large bowl, mix 7 cups of warm water, 1/2 cup of baking soda, 1/3 cup of ammonia, and 1/4 cup of white vinegar. Allow all the ingredients to mix completely, so the baking soda is dissolved. Pour the mixture in a spray bottle. Keeping this in a spray bottle will make it easy to mist the dirtiest areas specifically, and for storage. Fill your spray bottle completely, and then shake the solution well.

Spray the grout. Start on a small area, only as large as 1-2 square feet total. Spray your cleaning solution over the grout so it is dampened. Allow the mixture to set for 3-5 minutes to work into the grout. Begin scrubbing. Use a scrubbing brush of your choice – a hard bristled cleaning brush, a toothbrush, or a magic eraser are all good options. Put some hard work into your scrubbing to get the ground-in dirt out from between your spots tiles.
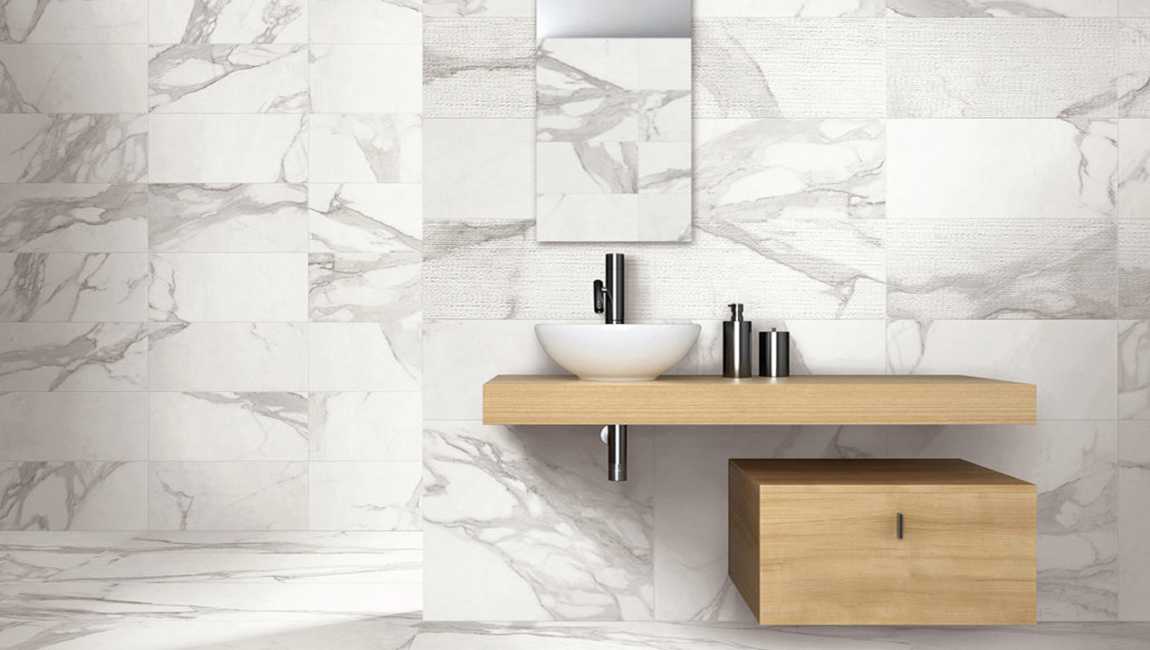

Clean up the dirty liquid. All y our scrubbing has probably created little pools of dirty liquid on your wall tiles. Use a damp cloth to wipe this up, and wring it out into a separate container. This will keep your kitchen tiles cleaner in the end. Complete your grout cleaning. Use the above process to move onto the rest of your grout, giving all it a thorough cleaning. Focus on simply getting the dirt and dark areas out of your grout, exposing the natural white underneath.


Do a final wipe-down. When you are convinced your grout cleaning is finished, do a second clean up of the entire area. If you were working on counters or in a bathroom, use a generic cleaning spray and rag to wipe down your element tiles.For floors, go ahead, mop your tiles again, and towel dry.

What Should We do When Tile a Backsplash?

If you’ll need to cut the floor tiles to fit into corners or underneath cabinets, it may help to purchase more tiles than you need to make up for tiles that break while cutting. Wall tiles tend to be thinner and more lightweight than flooring tiles. Make sure you choose the right type of wood tile for your project.

Slate tiles have a tendency to crumble when they are cut, so may be more difficult to work with if you’ve not used them before. Ceramic tiles, or other types of mosaic tiles, will be easier to work with and cut.

Sand the wall with 80-grit sandpaper. Sanding down the wall will remove any grease or grime that will stop the tiles from adhering properly, as well as providing a coarse surface to help the mastic hold more tightly. Use a medium-grit sandpaper, around 80 or 120-grit, to sand down the entire surface you want to tile.

If your surface has a lot of grease stains, it may help to clean them up before sanding. Use a cloth dampened in a mixture of water and dishwashing liquid to wipe them away, giving the wall plenty of time to dry before you attempt to sand it down.

Wipe the wall down with a damp cloth or sponge. Dip a cloth or sponge in water and wring it out as much as you can. Wipe down the surface of the wall to get rid of any stray dust or dirt leftover from sanding. Make sure that the cloth is only slightly damp, and that the wall is completely dry before you begin tiling it. Water left on the wall may change the consistency of the mastic and stop your tiles from staying in place.

Mark a central line on the wall. Use a measuring tape to find the midpoint of your backsplash and mark it with a pencil. With a bubble level, draw a vertical line from the base of your backsplash to the top of it. This will help keep your ceramic tiles centered and even as you work. In place of a pencil line, you could also use a laser level as a guide for your first tiles. This will be much easier to see but isn’t necessary if you don’t have one. Marking a central line will help ensure that the edges of your backsplash are even.

How to install ceramic wall tiles?

Install a batten to keep your first row straight. With everything else ready to go, you’ll want to install a batten to help keep your cement tiles rows straight. This is a piece of scrap wood, such as a piece of 1×4 lumber, that you use as a long straight-edge, placing the first row of rustic tiles right against the batten. Align the top edge of the wood so that it follows exactly along the mid-level line that you marked, then screw it into the studs. Once the wood tiles have been placed, simply unscrew and remove the batten. Double check that everything is level before installing the tiles on the batten. You’ll also want to check it all the way across, since there may be dips in the wood you use for your batten.

Mix the mortar. You’ll need thin set mortar to lay your ceramic tiles. While you should always go by the manufacturer’s instructions, a general rule of thumb is to start with the powder in a bucket and just add water slowly and mix until the consistency of the mortar becomes like peanut butter. You should also allow it to “slake” after you first mix it up. This means you allow it to rest for 10-15 minutes and then stir it up again. Now it is ready to use.

Spread the mortar. Working in a roughly 2×3’area, use a tiling trowel to apply the mortar. Hold the notched trowel at a shallow angle against the wall, so that the notches on one of its long sides dig grooves into the mortar. Use long, sweeping motions to apply the mortar. The direction of the grooves doesn’t matter but the lines should all be roughly parallel.

Your trowel size will depend on the size and type of marble tiles you’re using. For the average small wall tiles which are currently popular, you will want to use a 1×4″ square notch trowel. Test a tile design to make sure the mortar is mixed and spread correctly. Mortar a small spot and then place a wood wall tiles. Pull the tiles price up and look at the pattern that is create on the back. If you see clear lines, then the mortar is too dry. If you see mounds then the mortar is too wet.

Place your tiles on the wall. With the mortar ready to go, you can start placing your tiles. Just twist them into place, sticking to the small area that you prepared for yourself. Place your spacers between each tile as you go. These are usually cross shaped and placed at the corners but if you have unusual tiles you may have to improvise, such as by placing only one arm between tiles and letting the rest of the spacer stick out. If the mortar rises up between the tiles as you place them, the bed is too thick and you will need a smaller trowel. Check the tiles for level as you go. This is when a laser level can really come in handy.

How to hanging wall tiles?

Apply a 1⁄8 inch (0.32 cm) layer of adhesive to the wall. Start applying the adhesive in a bottom corner, about 1 tile length away from the bottom and side of the wall, leaving space for the edge tiles design. Scoop out a golf ball sized amount of adhesive onto a notched trowel, and spread enough adhesive in a thin layer over the wall to hang 2-3 wall tiles at a time.
You may need to move the trowel over the adhesive a few times to ensure that it’s thin and level.

Pre-mixed adhesive tends to be less expensive and work well for marble wall tiles. If you purchased a powder adhesive, mix it according to the directions until it’s the consistency of peanut butter. Use the trowel to add grooves to the adhesive. Hold the trowel at about a 45-degree angle from the wall. Move the trowel horizontally across the wall to make the grooves, applying consistent pressure as you spread. This will create the necessary ridges in the adhesive to allow for the wood wall tiles to stick to the wall.

Check the packaging of the adhesive to make sure you’re using the right sized notches for the marble tiles to stick to the adhesive. Most trowels will have 2 sets of notches that are different sizes. Hang the first tiles and continue the row with more adhesive and tiles. Carefully line up your first tiles, and press it into the adhesive, wiggling it slightly to create suction before positioning it in its spot.

Then, continue adding ceramic tiles in rows or columns following your pattern. Once you’ve covered most of the adhesive on the wall, apply more and continue hanging wall tiles price in your pattern. Remember to work in small sections at a time, only applying the adhesive where you’re tiling wall tiles. You may need to wipe off adhesive that oozes out from between the tiles with a damp cloth.

Add spacers in between each of the tiles to ensure even grout lines. As you’re hanging up the wall tiles design, position plastic spacers in between them to make room for the grout later. The spacers fit between the wood marble tiles and stick into the adhesive. Some floor tiles have built-in spacers. Be sure to check yours before you buy spacers.

Cut your tiles with a wet saw or nippers. Gather all of the tiles that you marked with the wax crayon during your dry-lay, and measure the length again to ensure that it’s in the right position. Put on a pair of safety goggles and carefully align the tiles with the blade of the wet saw or the shears of the nippers. Then, move the tiles through the blade or close the nippers to cut the tiles. For large tiles, you may need to rent a tile-cutting saw, also called a wet saw, from a local home and garden store. You can cut tiles smaller than 2 inches (5.1 cm) with nippers, which are shears that are used for cutting small pieces of glass.

Hang edge tiles by applying adhesive to the backs of the tiles. Take a tiles for the edge of the wall and apply the adhesive to the back, as if you were putting butter on a piece of toast. Then, position the tiles where it needs to go, and add the spacers. If the tiles has been cut, make sure you’re placing it in the right spot. If your tiles fit perfectly in the space and you don’t need to cut any of them, you should still use this method to do the outer columns and the top and bottom rows. This prevents the adhesive from getting on other surfaces or the pre-layed tiles.

How to distinguish the good and bad of the tiles?

Water absorption reflects the density of marble tiles, and indirectly reflects the hardness of cement tiles, but there is a point need to pay attention, the tiles design are not be the lowest water absorption the better quality is. When purchasing ceramic tiles, we need to pay attention to the smoothness of the kitchen tiles. Poor quality wall tiles the smoothness will be uneven.

The surface of the tiles determines whether the effect is smooth, and the straight test of the edge corner of the tiles are to see if the wood tiles are tidy and the size of the gap is consistent. To test the stain resistance on tiles, we must know that tiles will accompany us for a long time.

The wood marble tiles now have a series of innovations in wear resistance, such as polished tiles, microcrystals tiles, full body glazed tiles, and rustic tiles, which have a qualitative leap. To judge whether the surface is wearable, we only need to pick up the knife or key in the hand and scrape to the surface of the tiles to check if it will scrape the glaze off the surface of the tiles. If such a small description can not be accepted, it can be concluded that this tiles are not a good companion who can accompany us for a long time.

The qualified tiles are usually packed in cartons, and the name of the production plant, the product name, the trademark, the size, the grade, the weight, the color number and the quantity should be printed on the packing box. The national standard stipulates that the surface quality of the superior tiles should be observed at least 95% surfaces at least 0.8 meters without obvious defects. Of course, most of the tiles will be able to reach the standard if they are based on this standard. But we mainly do not look at 95%, but have no obvious defects, from the packing box random checks of several tiles, see the surface of the product has the following defects: ripples, spots, glaze, knock, crack, lack of glaze and so on.

The dust, the debris thoroughly clean, no empty drum, crack and sand and other defects, the smoothness will fundamentally determine the quality of the tiles, good tile workers this step is in place. Before laying the tiles, we need to find the vertical line in advance so that the tiles are uniform and vertical. In addition, the elevation control line should be popped around the wall before the construction, and the cross line is popped out on the ground so as to control the size of the marble floor tiles.

On the basis of the design requirements of the drawings, the color, texture and surface leveling of the glazed floor tiles are selected strictly, and then the pre paving is required according to the requirements of the drawings. The possible size, color and texture errors in the pre paving are adjusted and exchanged until the best effect is achieved, and a smooth stack is stacked smoothly according to the paving.

The surface of polished floor tiles should be wetted before paving. The floor tiles are placed on the cement mortar according to the requirements, and the wood floor tiles are tapped with a rubber hammer until the dense and smooth surface reaches the requirements. It is very uniform when the mortar is smeared. It is to prevent the possible cause of the tile empty, and there is a hole and other tools to smooth the post paving of the cement layer.

What’s the ceramic tiles?

Ceramic tiles are a mixture of clays and other natural materials, such as sand, quartz and water. They are primarily used in houses, restaurants, offices, shops, and so on, as bathroom wall and kitchen floor surfaces. They are easy to fit, easy to clean, easy to maintain and are available at reasonable prices. Ceramic tiles design show good strength and can withstand high temperatures and acidic materials, but are brittle, and weak in tension and shearing. Applications include floor tiles, pipes, bricks, cookware, tableware, sanitary ware, pottery products, gas and fire radiants, kiln linings, glass and steel crucibles, knife blades, disc brakes in vehicles, watch cases, and biomedical implants.

The global demand for ceramic tiles was valued at around USD 72.0 billion in 2018 and is expected to reach around 120.0 billion in 2020, growing at a CAGR of slightly above 9.0%. In terms of volume, the global ceramic tiles market stood at 13.0 billion square meters in 2018.

The demand for ceramic tiles is primarily driven by the growing construction and infrastructure industry. Strong growth of construction industry in emerging economies such as India, China, Brazil and South Asian countries is expected to fuel the growth of ceramic tiles market in the future. Increasing industrialisation and urbanisation has resulted in growing demand for commercial as well as residential buildings in the emerging economies. Technological advancement in the manufacturing of ceramic tiles and availability of abundant raw materials is also contributed in growth of ceramic tiles market.

Floor tiles, wall tiles and others are the key product segment of cement tiles market. Floors tile was the largest product segment accounting for more than 50.0% share of the total volume consumption in 2018. Floor tiles are also expected to be the fastest growing product segment in terms of volume throughout the forecast period. Marble Wall tiles was the second leading segment. Other products segment, including tabletops, facades, countertops, etc. are also expected to exhibit significant growth in the years to come.

Ceramic tiles are widely used in host of application in different industries such as, residential replacement, commercial, new residential, others (facades, countertops etc.). Residential replacement was the largest application in 2018, accounting for more than 45% of the total volume consumed. Demand for wood tiles used for residential replacement has increased due to its potential as a substitute for paints and other products. New residential is also expected to grow rapidly.

Asia Pacific was the largest market in 2018 with more than a 50% share in total volume consumption. Europe was the second largest market followed by Latin America, Middle East Asia & Africa and North America respectively. China, India and Brazil are alos major driving factors for the growth of global ceramic market. Some of the key industry participants in global ceramic tiles price market include Porcelanosa Groupo, Saloni Ceramica, Mohawk Industries, BARANA Tiles price, RAK Ceramics, Kajaria Ceramics, Crossville Inc., Ceramiche Ricchetti, Atlas Concorde, and Florida Tile.