Posts

How Removing Stains with a Poultice?


Mix paper towel pieces, ammonia, and hydrogen peroxide in a bowl. Rip up a couple sheets of paper towels and place them in a bowl. Note that the amount of paper towel you use depends on the size of the stain you’re trying to remove. Pour a few drops of ammonia in the bowl, and enough hydrogen peroxide to completely soak the paper towel chunks.


When handling ammonia, you should wear gloves to avoid skin irritation and burns. If the stain you’re trying to remove is quite large, you may want to fold up a paper towel instead. Attempt this method if you’re dealing with old or tenacious stains that can’t be removed with more conventional means.


Place the paper towel poultice over the stain. Pick the saturated chunks out of the bowl and place them over the stain. Be careful not to apply too much pressure, or the hydrogen peroxide and ammonia might leak out over your marble tiles. If you’re dealing with a vertical surface, the paper towel chunks should be wet enough to just stick on.


Seal the poultice with plastic wrap. Stretch a length of plastic wrap over the poultice and stain. Apply pressure to its sides, so that it completely seals the poultice, then use clear adhesive tape to secure the plastic wrap. Use a toothpick to poke a couple of holes in the plastic wrap to allow airflow. Let the poultice sit for two to three days.


Remove the plastic wrap and wash the area with warm water. You should be able to lift the plastic wrap easily with just your fingers. Pick the paper towel poultice off of your surface and throw the chunks away. Then, dampen a cloth with warm water and wipe the area clean. After washing the marble tiles, use a dry cloth or paper towel to dry the area.

How Sealing Your marble tiles Shower?

Test to see if your shower needs to be sealed. Unless you have a white marble tiles shower, you should not seal your shower. You should also not seal your shower if there is already an existing seal on it. Test to see if there is sealer by putting a couple of drops of water onto the surface of the shower and allowing the water to dry for ten minutes.


If the area is dark, it means that your marble tiles has absorbed the water and most likely needs to be sealed again. If the sealer has pooled on top of your marble tiles, it means that it’s already sealed. If your shower is already sealed, there’s no reason to do it again, and it can actually be detrimental to your marble tiles.


Dust and clean the inside of your shower with a damp rag. The first step before you seal your shower is to make sure that all the dust and dirt that may be built up is removed before you seal it in. Wipe down your shower with a damp rag and water, then dry it with a clean rag. Make sure that your shower is dry and free of dirt before you start sealing.


Spray down your shower with the sealer and wipe it in. Spray down your shower with the sealer and use a sponge or a rag to wipe the sealer in. Work your way from the top of the shower to the bottom of the shower and try to apply even coats throughout it. Some popular brands of marble tiles sealer include DuPont Stone Sealer and Miracle Sealants.


It’s important that you get a stone sealer made for a stone like marble tiles. Allow the sealer to soak for 15 minutes. During this period the sealer will be absorbed by the marble tiles. You should start to see the marble tiles turn a darker color as it absorbs the sealer. Wipe off excess sealer on the surface of your shower. Use a dry absorbent cloth to remove any excess sealer that pools on the top of your shower.

How Removing Tough Stains?

Use an enzymatic cleaner on pet stains. If you have stains from pets or other animals on your concrete, try an enzymatic cleaner like OxiClean. These types of cleaners target and help to break down protein in stains. You should apply these types of cleaners directly to the stain without diluting them with any liquid and then let them soak into the stain.


However, it can take up to a few days for these types of cleaners to break down the stains on your concrete. Use an oil-based cleaner on non-washable crayon stains. Oil-based cleaners like Goo-Gone and WD-40 are great for stains made by non-washable crayons. Spread on the cleaner and let it soak before scrubbing at it with a short, stiff-bristled brush. Then rinse with water.


Try laundry detergent on grease stains. If you have concrete stains made by grease, laundry detergent can help remove them. Make a paste of powdered laundry detergent and water for grease stains. Apply the paste to the stain, cover it tightly with plastic wrap (you can tape the edges to your concrete surface), and let it soak for 24 hours. Then scrub and rinse.


Sprinkle kitty litter over oil stains. For oil stained concrete, cover the affected area with a clay kitty litter and grind it in with your feet while you’re wearing old shoes. Let it sit for up to 24 hours and then sweep up the kitty litter and rinse it away. This might take a few rounds, depending on the size of the stains you cleaned and how much cleanser you had to use.


You can let the area dry naturally, particularly if you’re cleaning on a hot day. Make sure that you hose off any plants or planting beds that are around the concrete patio and may have been sprayed with cleaner. Use a degreasing agent for oil, grease, or hydrocarbon stains. Alkaline cleaners, which are also called degreasers, can help you remove stains caused by oil, grease, or hydrocarbons.

How Using the Cleaning Solution?


Clear the area to be cleaned. Sweep up any debris – leaves, twigs, etc – and move any outdoor furniture out of the way. Make sure that pets and kids can’t get into the area, particularly if you’re going to use bleach. Protect nearby greenery. Make sure to protect nearby plants.


Hose them down to give them a protective covering of water (it will help any bleach or vinegar slide right off) or cover them with light plastic. You can also create barriers between the area you’re cleaning and any grass by laying down rolled up towels or sheets at the edge of the grass.


Hose it down. Using your garden hose or buckets of water, rinse down the area to be cleaned. You can also use a bucket of water and a mop if you’re worried about the water draining properly. Apply the cleaner. Depending on the type of cleaner you’re using, you’ll want to spray, pour, or spread your cleaners over the area to be cleaned.


Use gloves and a protective face mask for this step, especially if you’re using bleach. You can let any of the mixtures soak for a few minutes or up to half an hour if you have particularly dark stains. If the stain persists after scrubbing, you may need to apply a second coating of cleaner. Wait 15 minutes before scrubbing again, and then hose it off.


Scrub with a short scrub brush. Once your cleaner has had time to soak, scrub at the stains with a short scrub brush. This will loosen up any stubborn dirt or grime that isn’t already lifted by the cleaner. Rinse off the cleaner. Once you’re done scrubbing, use a hose, spray bottle, or bucket of water to rinse the area you cleaned.

How to Decorate Cement Floors?


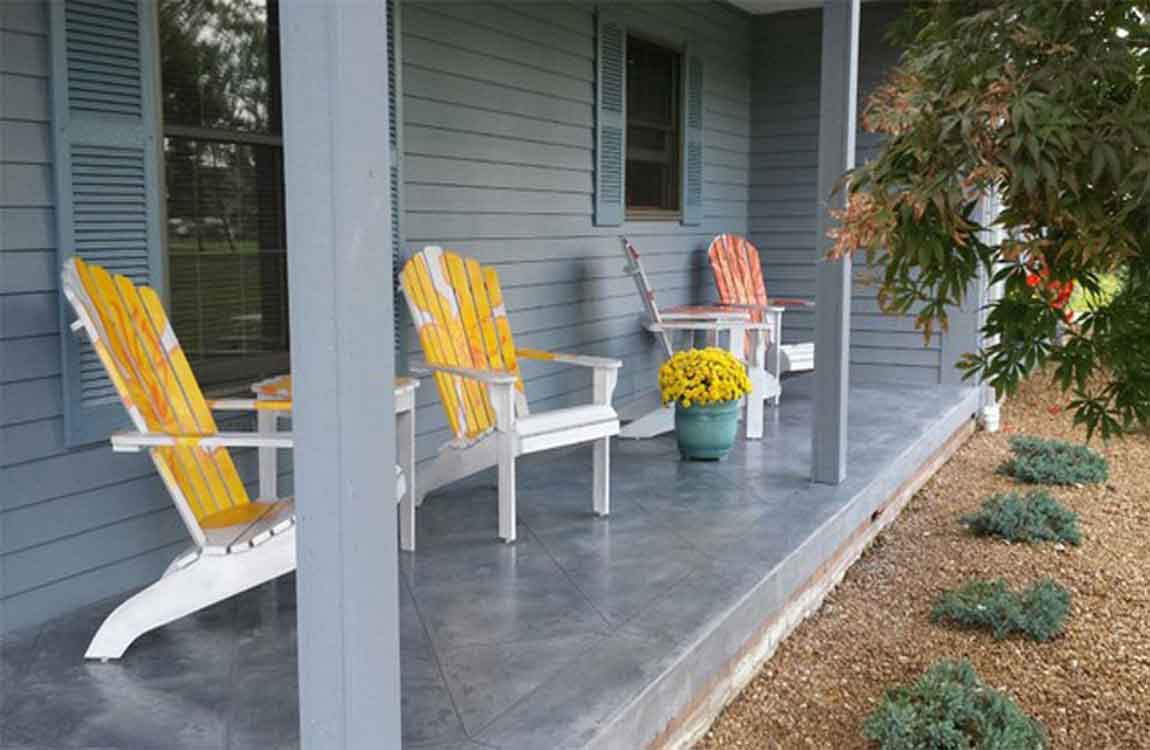
Concrete is an affordable flooring option compared with linoleum, vinyl, ceramic tile or carpet. It is easy to maintain and anti-slip for safety in your home. Cement flooring doesn’t have to be dull-grey, you can decorate your flooring to match the design of your home or work. By staining or painting your floor you can have a stylish new look for less!


Apply sealer to the larger surfaces with a roller. Once the edges are finished you can apply a sealer to the remainder of the area with a roller. This will make the application quick and easy for you. Make sure that your roller is clean. Dirt will stick to the wet surface and be hard to remove once the sealer dries.


Wait for two hours before applying the second and final coat. The sealer will need two coats to protect your stained surface. Once the first coat has dried, apply the final coat with a paintbrush for the edges, and then a roller. Apply a sealer every 3 to 4 years to ensure the long life of your concrete stain. If applied correctly, the seal you’ve placed on your stained surface will last for 3 to 4 years.


Wait 24 hours before placing anything on the stained surface. After 24 hours, only use the area for light activities. Any pressure on the surface can damage the stain. For any vehicle traffic on the surface wait 72 hours. Then cover the whole surface with a roller. This will give your cement floor a clean and smooth finish.


Make sure your tools are clean when applying the final coat. It is important that there is no dirt on the surface to get the cleanest finish. Hence, some of the base colour should also show through. The only brush strokes should be fine ones to soften the look as the paint is still wet.

How Nipping the Glass Tiles?

Use mosaic nippers to cut small pieces from thin glass tiles. Mosaic nippers are a great tool to use if you want your mosaic to consist of small, irregularly shaped pieces of glass tile. They look like pliers with a sharp clamp tip. For glass tiles, use nippers that have carbide wheels attached to the ends– these allow you to apply enough pressure to cut the glass without cracking or damaging it.


Use nippers on glass tiles 1⁄8 inch (3.2 mm) thick. Anything thicker may be too difficult to cut through. Nippers can be purchased from home improvement stores or online for around $15. Draw guidelines using a straightedge and a washable marker.


Even though nippers aren’t as precise as other glass cutting methods, you still want to give yourself some guidelines that you can follow as you nip pieces off of the larger tile. Use a straightedge to guide your washable marker to form an even and straight line on the glass tile. Use washable marker so you can wipe the markings away easily when you’re done cutting.


Put on safety goggles and clear your workspace of pets and people. Nipping glass tile can send sharp pieces of glass flying through the air, so before you work, you’ll need to put on well-fitting safety goggles. It’s also important to clear the area of other people so they aren’t at risk for getting hit with a glass shard. That includes pets, too! You don’t want a furry friend to get hit with a piece of glass either.


Hold the nippers like you would hold a pair of pliers. You will need to apply a fair amount of force to get the nippers to cut through the glass tile, so you’ll want to have a strong grip on the handles of the nippers. Use your dominant hand to grip the handles just like you would grip the handles of a pair of pliers, with the top handle in the middle of your palm and the bottom handle cradled by your fingers. Tip: You can wear a pair of thick gloves to make your grip more comfortable.

How Choosing Pool Tile by Style?

Use larger tile for easier upkeep. Save time cleaning your pool tile by having a larger tile finish, which has fewer seams that can collect dirty buildup. Go with smaller tile to create a captivating design. Add dimension to your pool by using smaller tile, which makes pool designs look more intricate.

Creating a mosaic or tile image is easier to do with small tile than with larger tile. Opt for blue tile for a classic swimming pool look. Incorporate multiple hues of blue into your design to add depth to your pool and make it more interesting. Use one shade of blue for a clean, uniform appearance.

Match your tile color with a color from your home for a unique pool design. Use red tile to complement the red brick on your house, or go with a green tile that blends with the surrounding landscape. Using a tile color other than blue will immediately make your pool stand out.

Mark the last tile in each row to indicate where to cut it if needed. As you near the edges of the room, you may find that you don’t have enough space to set the final tile. When this happens, you’ll need to cut your end tiles to ensure a proper fit. Measure the distance between the last full tile you laid down and the wall and mark this measurement on the end tile. You can cut the tile later using a masonry saw.

If the space left over at the end of a row is especially narrow, pick up the rest of the tiles in the row and shift them down half a tile’s length towards the opposite wall. Adjust your other rows accordingly. That way, you’ll have a larger partial tile at either end rather than a tiny sliver visible along only 1 wall.

Using Commercial Polishing Products


Remove any obstacles that may get in the way. The first thing you should do is remove any furniture or obstacles that may obstruct your ability to clean your floor. This includes tables and chairs, but also placemats and rugs. You don’t want to have to stop in the middle of the process to slide furniture out of the way.


This also includes the family pets! You may want to consider keeping the door closed, using a baby gate, or blocking off the entrance to the room with a chair or something that would prevent any four-legged friends from getting in.


Sweep the floors to remove large dirt particles. After clearing the room, take a broom and sweep up any dust and dirt that may have built up on the tile floor. If you plan to apply wax later, a dirty floor will make it difficult to adhere, and make the floor look grimy. You also don’t want to just move dirt around as you polish, so it’s best to thoroughly sweep the floor first.


Be sure to get into the nooks and crannies and remove as much dirt as you can. You could also use a dry mop, also called a dust mop, to sweep the floor. Dry mops are great for picking up dirt and dust without leaving streaks.


Scrub the grout in between the tiles with a soap and water and a scrub brush. Before you mop the entire floor, take a stiff brush and focus on cleaning the grout in between the tiles. Grout requires a little more effort to scrub clean, so you may need to get down on your hands and knees to scrub it well. Discolored or dirty grout will really stand out once your tile floor is polished.

How to Clean Outdoor Tiles?


Outdoor tiles are a great way to beautify a space, but you do need to clean them regularly. Identify what your tiles are made of (porcelain, wood, composite, or solid stone). Dust or dry mop the dirt and debris before you wash the tiles with a mild soap or vinegar solution. You’ll need to deep clean the tiles once or twice a year to prevent mold and mildew from growing. To keep the tiles looking great, always avoid using abrasive cleansers and products.


Remove stains as soon as you notice them. Try to remove any stains as soon as you notice them. Fill a 5 US gal (19 L) bucket with water. Buy a commercial floor cleaner that’s safe to use on porcelain and add 3 to 4 capfuls of the product to the water. Use a small brush or mop to scrub the mixture over the stain until it’s removed. Avoid using an oil-based cleanser for stain removal on your porcelain tiles. These can leave an oily residue on the tiles which can make them slippery.


Avoid cleaning with abrasive materials. While you might think that you need to scrub built on dirt with a rough brush, you should avoid anything that’s abrasive to the porcelain. Avoid using abrasive cleaners like: Hard bristle brushes or steel wool, Cleaning products with ammonia or bleach, Oil-based detergents or wax cleansers.


Avoid cleaning with abrasive materials. Your wood or composite tiles may become slightly scuffed over time. These scuffs may disappear on their own, so avoid trying to remove them with abrasive cleansers (like sandpaper or pressure washers). If you place salt or ice on your tiles in the winter, clean it off as soon as the hazardous weather passes. Ice and salt can damage the tiles if they sit on them for very long.


You’ll need to change the water several times and keep rinsing until the soap residue is completely removed. Stone tiles tend to fade in color over time due to sun exposure, so use a stone enhancer and sealer to protect them. Make sure you find one that is safe for outdoor use.

Cleaning Porcelain Tiles

Sweep the tiles daily. Try to sweep your porcelain tiles every day or so. Use a soft, natural bristle broom or take a vacuum attachment and suck up the dirt. Regular sweeping will prevent your tiles from becoming caked with dirt and stained. If your porcelain tiles lead up to an entryway for your house, you’ll want to sweep them more often. This will prevent people from tracking dirt into your house.

Wash the tiles with clean water once per week. Every few days (or whenever you notice a little dirt or grime building up) you should clean your outdoor porcelain tires with warm water. Fill a bucket with clean, warm water and mop the tiles. This will remove most of the dirt and keep the marble tiles looking their best. Try to wring most of the water out of the mop. You don’t want excess moisture just sitting on the tiles.

Deep clean the tiles once a month. At least once a month, fill a large bucket with 2 gallons (7.6 L) of clean water. Add 1⁄4 cup (59 ml) of white vinegar and stir the mixture well. Submerge a mop into the cleanser and wring it out. Mop the floor with the cleaner to loosen any dirt. If you prefer, you can buy a commercial cleaner designed for porcelain tiles instead of using the vinegar mixture.

Rinse and dry the deep-cleaned wall tiles. Once you’ve scrubbed the floors with the vinegar mixture, submerge the mop into clean water and wring it out. Mop the floor with the water to rinse off the rest of the cleanser. Take a large clean towel or microfiber cloth and dry the tiles.

If your porcelain tiles are really dirty, you may need to deep clean and rinse them a second time. If your porcelain tiles cover a large space, consider mopping, rinsing, and drying small sections of the floor at a time.