Posts

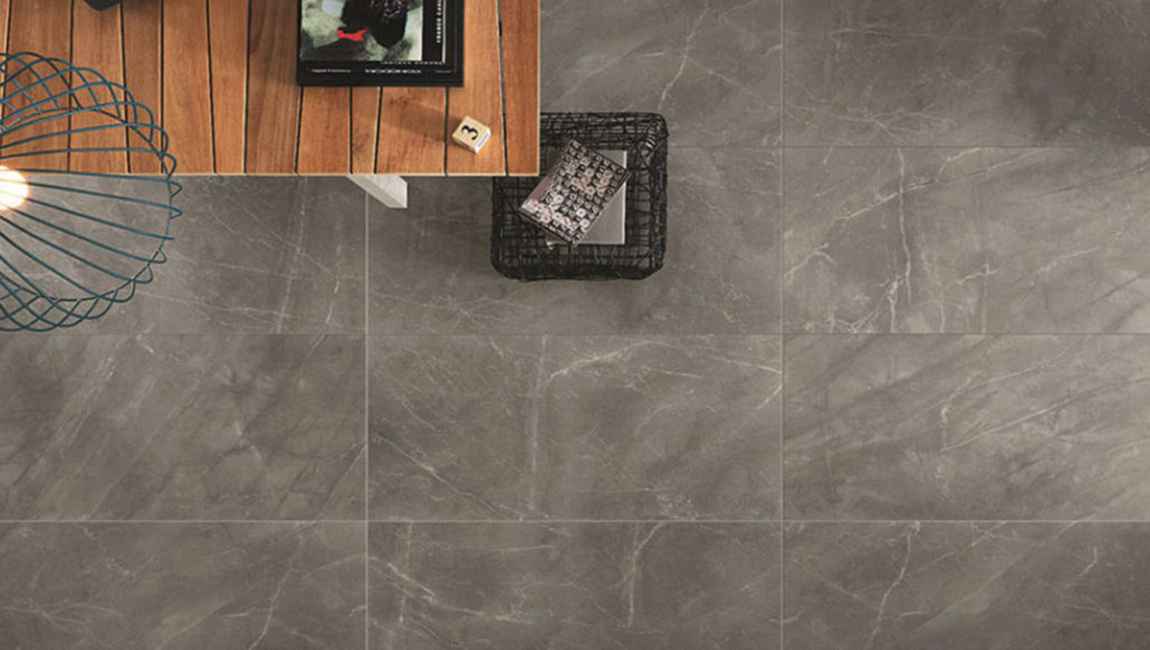
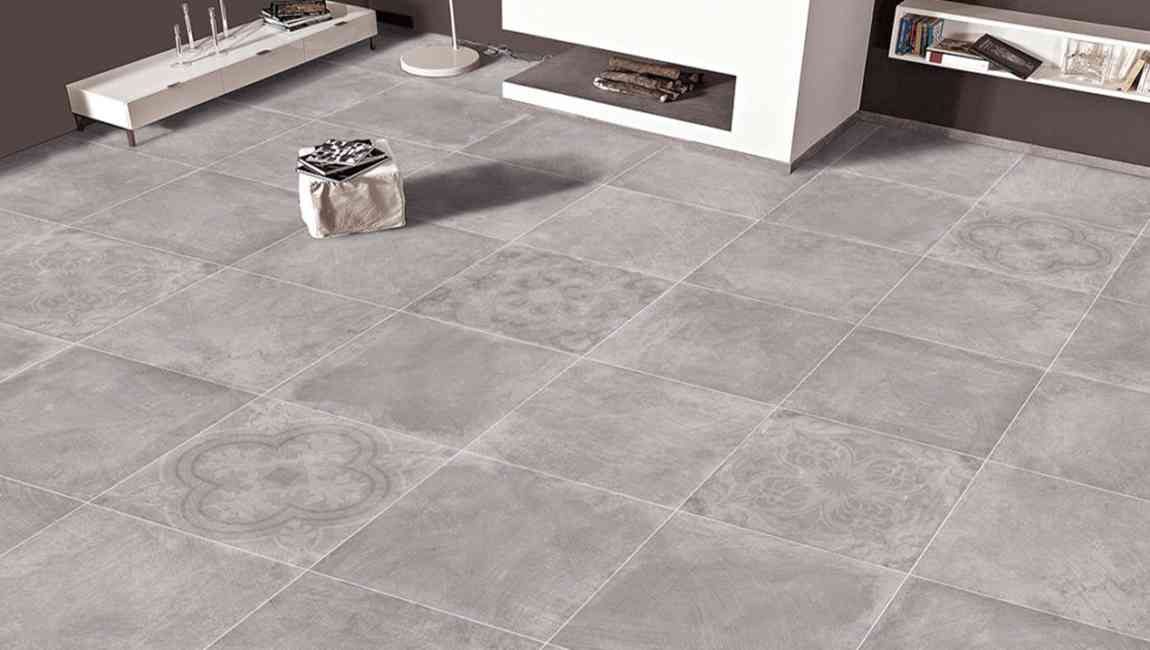
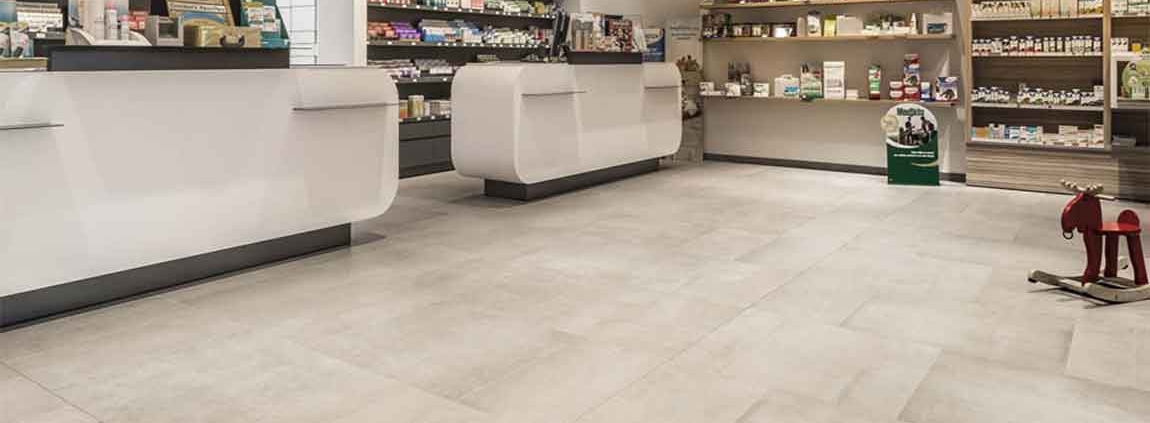
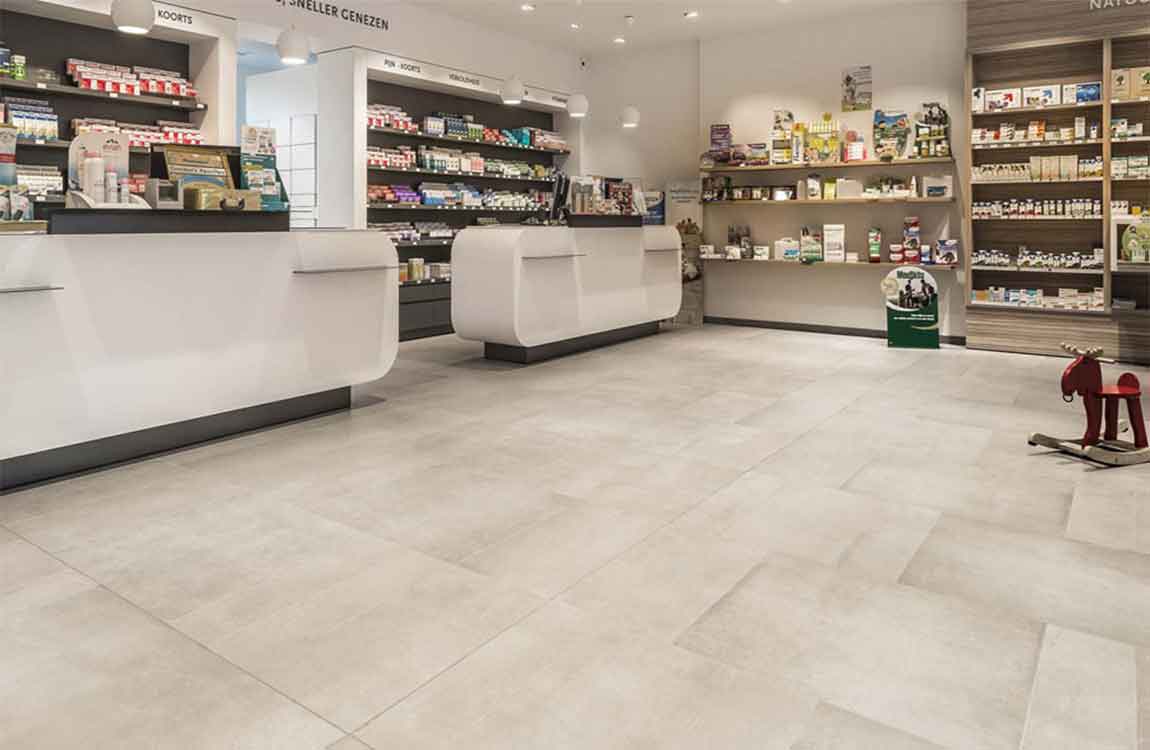
How Doing Daily Cleanup of Marble Tiles?

Wet the surface of the tiles. Run a clean, damp cloth over the surface of the cultured marble tiles to slightly wet it. This helps you avoid damaging the glaze that gives it its shine when you apply the soap or cleaner. If the surface already has lingering water, such as from a shower, you don’t need to add more.


Apply a mild soap or all purpose cleaner to the surface. You can spray the soap or cleaner directly onto your cultured marble tiles, or you can dampen a clean towel and wipe it over the surface. Choose a water-based cleaner with a neutral pH. It’s the safest option for cleaning your cultured marble tiles without damaging the glaze or scratching the surface.


Wipe the surface of the cultured marble tiles with the rag. Make circular movements as you wipe away the soap or cleaner. If necessary, apply more soap or cleaner to the cultured marble tiles. Continue wiping with your cloth until the surface is dry. Use a soft cloth to avoid scratching or damaging the surface. Don’t use abrasive sponges or cloths.


If your cloth is very wet, switch to a clean, dry cloth to remove the remaining cleanser. Avoid using harsh chemicals, which can damage the surface. Harsh chemicals can damage the glaze on your cultured marble tiles, making it appear dull. These cleaners can also cause chemical scuffs and scratches on your cultured marble tiles. Stick to mild soaps and cleaners.


Rinse away the cleaning agent and polish the marble tiles, if desired. Fill your cup with cold water again. Pour it on the cleaned portion of your marble tiles and wipe up excess liquid and remaining dirtiness with a clean, soft, dry rag. After this, your counter should be clean. This method will remove dirt and debris but not grease.

How to Wax a Floor?


Waxing or finishing your floor protects it, creates a no-slip surface, and adds an attractive shine. As long as you apply it correctly, and don’t mind topping up the wax once or twice a year, you can create a durable, beautiful surface. Where waxing once required you to rub a paste into the floor on your hands and knees, all but the most dedicated now choose a no-buff wax that you can simply mop onto the floor.


If you don’t want to strip a previous finish, you can use a water-based silicone polish instead of waxing. Simply sweep the floor, then apply several even layers of the polish with a mop. Remove all furniture and objects from the floor. Determine where you plan to wax and remove everything from that area. Put up signs in public areas to let people know the area will be off limits for at least 8 hours.


To be extra safe, tape down the edge of any adjacent area to protect it from the wax, especially carpet areas. Determine whether you need to strip your floor. If your floor has not previously been treated with wax or finish, you can skip straight to Waxing the Floor. If it was treated with wax but the old layer only suffers from scratches, not discoloration, you can also skip straight to waxing.


Otherwise, you should continue on to Stripping the Old Finish section to learn how to strip the previous treatment away. Use a mop to apply floor stripping solution from the far end of the floor to the exit. Stripping solution makes the floor slippery, so plan your route in advance to avoid having to walk over it.


Scrub the floor evenly and allow to sit for 5 to 10 minutes, but do not allow it to dry. Try to agitate the finish with your mop as you apply the stripping solution. The stripping solution should change color as it removes and mingles with the finish over the next few minutes If you are stripping a large floor, do so in small sections so the stripping solution doesn’t dry.

How to Clean Your Kitchen Floor?

Cleaning a kitchen floor is simple with the right supplies. Pick the right cleaner for your floor type. Then, vacuum the floor and apply the cleaner. Let your floor dry and make sure to clean it regularly in the future. Vacuum your floor first. Regardless of your floor type, the first step to cleaning your floor is giving it a good vacuuming.

On a weekly basis, vacuum and then mop your floor. This will remove any dirt, debris, or hair that may get plastered to the floor during the mopping process. Run your vacuum over the floor, using the upholstery attachment to get into nooks and crannies. While vacuuming provides the most thorough cleaning, it’s okay to use a broom and dustpan if you don’t have a vacuum cleaner.

Use a dry mop on laminate or wood floors. You can purchase a dry mop at most department stores. If you have a laminate or waxed wood floor, you should not expose it to liquids. Instead, run your dry mop over the floor once a week to remove dirt and stains.

Apply the cleaning product one section at a time. Dilute your cleaner in a spray bottle or bucket. Use a rag, sponge, or mop to clean your floor one section at a time. Get your cleaning tool wet, wring it out slightly, and run the rag, mop, or sponge across the floor to remove any stains or dirty spots.

The cleaning utensil is mostly a matter of personal preference. However, microfiber cloths tend to work well on most floor types. Never use an abrasive cleaning tool on any type of kitchen floor. Things like steel wool can damage a kitchen floor.

How Cutting Multiple Tiles before Toilet Installation?

Score the cut lines with a tile scribe. A tile scribe is a small, sharp hand tool that etches a cut line into the tile. This etching helps make sure the tile snaps where you want it to instead of breaking or cracking elsewhere. The scoring only needs to be 0.125 in (0.32 cm) or so deep.


You can get a tile scribe at any hardware store or online. Use tile nippers to clip away the excess tile. Think of tile nippers as industrial-strength fingernail clippers. Start at the corner of the tile that’s being cut away, and squeeze the handles together to make the top and bottom blades take small “bites” out of the tile. Start “nibbling” more carefully as you approach the scored line.


Standard tile nippers will work with practically every kind of tile, although some natural stone tiles (like slate) may be too fragile. Consult your tile supplier if needed. You can also use specialty tile nippers for glass tiles or other particular types. Be careful not to nip one of your fingers while you work. Wear work gloves to protect your hands from cut tile edges and safety glasses to protect your eyes from snipped shards of tile.


Make sure your cuts are correct by dry-fitting the tiles. Because the toilet base will cover the cut tile edge, your cuts don’t need to be perfect. However, take the time to dry-fit the tiles in place to make sure your cuts are generally accurate—ideally, no more than 0.5 in (1.3 cm) larger than the flange.


Use plastic spacers to account for your grout lines when dry-fitting the tiles. If you’re going to rest a removable toilet flange on top of the installed tiles, remember to remove it before dry-fitting (and later, when laying the tile!). If your dry-fit lines up properly, you’re ready to set these tiles in place in the same way you did the rest of the floor.

How Preparing the Backsplash Surface?

Turn off the power to your kitchen. Find the electrical panel in your home. It is typically a small, metal panel painted to match your wall. Open the panel, then find the switch for the bathroom or kitchen electrical outlets (wherever you are doing the backsplash). Flick the switches to the off position. Remember to flick the switches back on after you have finished installing the tiles.


If your tiles are already on the wall and you wish to cut a hole in them, complete this step, then click here to learn how. Remove any light switch and outlet covers. Use a screwdriver to remove the screws from each cover. Place the covers into separate zippered bags along with their matching screws. Work 1 cover at a time so that you don’t mix or lose the pieces.

You will need to reinstall the light switch and outlet covers after you have finished installing the tiles. Clear and cover the counters. Move anything on the counter that might get in the way, such as coffee makers and toasters. Cover the counter with a plastic sheet to protect it. If you are installing the tiles later, it would be a good idea to mask off counters and cabinets.

This will save you a step. To mask off the counters and cabinets: lay strips of painter’s tape along any counter or cabinet edges that touch the backsplash wall. Mark the center of the wall, then draw a plumb line through it. Find the center of the backsplash wall, and make a like mark with a pencil.

Place a 2-ft (61-cm) level against the mark and orient it vertically. Use the edge of the level as a ruler to draw a vertical line spanning the height of your backsplash. The plumb line will help you lay out your tiles evenly once you go to mount them on the wall. Make sure that the level is straight. The bubble inside the glass tube should be centered between the lines.

How to lay a ceramic or porcelain floor tiles?

Find your center point. You have already determined the size of your room, which is 84 square feet. Finding the center point is critical for laying the floor tiles. It will determine where you will lay your first marble tiles and the next ones. Measure one wall, for example the 12 foot (3.7 m) wall. At 6 feet (1.8 m), half the distance, mark a point with a pencil.

Do the same on the other 12 foot (3.7 m) wall. Using your chalk line, anchor one end at the midpoint of one wall and stretch across to the midpoint of the other. “Snap” the chalk line by lifting it up slightly and letting it hit the ground; this will leave a straight line on the floor. Measure the 7 foot (2.1 m) walls and mark a point a 3 ½ feet on both sides.

Rehearse laying out kitchen tiles. When you have found your center point, you will notice you will have a “quadrant” design on the flooing tiles, or 4 equally sized areas. Starting at the center, “rehearse” your tiles design pattern by simply laying them on the marble floor tiles without any adhesive or glue. Place the first small tiles at the corner nearest the center point. You are only going to work in one quadrant at a time. Begin placing wood tiles in a straight line towards either wall, leaving a small space in between the tiles.

Repeat the same process for the 3 ½ foot line. You will use 3 full cement tiles and 1 tiles cut to 4 inches (10.2 cm), since the size of the 3 joints plus the 1 wall joint equals 2 inches (5.1 cm) and your original tiles size was 6 inches (15.2 cm) (6 inches original tile- 2 inches total joint= 4 inch tiles). Note that this does not follow the realignment strategy mentioned above. Because this room is “squared,” the true center is best left where it actually is. Simply make uniform cuts as they correspond to each side (in this case, you will have 9 inch (22.9 cm) tiles as the wall tiles on the “short” 7 foot (2.1 m) walls and 4 inch (10.2 cm) tiles on the long 12 foot (3.7 m) walls.

Pre-drill some tiles to fit over items such as radiator pipes, bath pipes, and so on. To achieve this you may have to drain down radiator systems, remove the rad from the wall and take the taps off the pipework. Very time consuming but worth the effort if a minimal look is desired. Your floor will look better if you can drill a hole in the tiles and lay the tiles over the pipe.

Use a diamond hole saw to bore into the tiles and drill a perfect hole. If you do not have a hole saw you can use a wet-tile saw to cut a square hole in the center of the tiles. Draw a square on the back of the tiles in the desired location of the hole. Carefully place the backside of the tiles against the wet-saw blade at the midpoint of one of the sides of the square. Gently push the tiles against the the blade until the edge of the square is cut. Repeat for the other sides of the square hole.

The secret of tiles

The marble tiles are one of the main materials we need when decorating, but when selecting tiles design, is there have any way to choose tiles, what are the points of attention about tiles price, how should professionals person to buy tiles? When buying kitchen tiles, first of all, to distinguish the use of the place, secondly to understand the various parameters of tiles, and then to know how to distinguish the quality of tiles, and finally do not greedy cheap, to buy a good quality small tiles.

There are many kinds of cement tiles, different types of tiles characteristics, advantages and disadvantages are different, different places on ceramic tiles requirements are different, according to the characteristics of tiles and the use of place to buy ceramic. The kitchen need anti dirt and anti slip floor tiles, and the living room needs bright and nice tiles. In addition, the requirements for floor tiles and wall tiles are different.

The parameters of each tile are different. Knowing these parameters can help you choose the most appropriate marble tiles design. The water absorption rate of tiles, the national standard is flooring tiles to be less than or equal to 0.5%, the water absorption rate of internal wall tiles design between 10% and 20%. The tiles wear resistance, different tiles wear resistance is different, according to the use of different site requirements are also different. The length and width error, size and right angle of tiles need to be clearly understood.

The choice of wood marble tiles are not only in good color but also in good quality. Then how to detect the quality of wood tiles? The simplest way is to see whether the surface of the tiles are flat, gloss is not high, whether the pattern is clear, whether the cut surface is neat. Then tap the polished tiles again, and the crisp and continuous bath tiles are better. At this time, you can also weigh the weight of the tiles at the same time, the better the quality of the heavier tiles.

Finally, the method of dripping to test the water absorption of tiles, as well as the way to test the load-bearing capacity by pressing, using a pen to write on the tiles, testing the wear resistance of the tiles. The price difference of tiles are bigger, do not believe the tiles with discount sale easily. There are many discount information just to attract customers, but the quality is not necessarily good.

Let’s talk about the wood floor tiles

Ground decoration is a very large project, especially when selecting materials, with large area and heavy material, so it is difficult to choose. Wood flooring, tiles, imitation wood flooring and imitation wood floor tiles, which one is the best? Today, BARANA introduces their respective strengths and weaknesses, so that you are no longer so entangled.

The main raw materials of wood flooring are mainly from natural wood. In the pursuit of healthy and natural fashion, wood tiles is becoming more and more popular. The main reason is that the wooden floor comes from nature, the raw materials are healthy and environmental protection, the decoration effect is fresh and elegant, durable and smooth.

But wooden floor is easier to be corroded and easy to deform after water. It needs to be carefully maintained for a long time. People who don’t like tossing and turning are not suitable for wood marble tiles. In addition, because wood regeneration is slower, raw material prices are more expensive.

The raw material of tiles design are mainly clay, stone sand, metal oxide and so on. The process of making is more complex than wood floor. It needs to be screened, lapping, pressing, calcining and so on. Tiles price surface is smooth, cleaning and cleaning is relatively simple, and do not need special maintenance, long life. Hard material, heat conduction and other properties make small tiles waterproof and fire resistant. Because of the controllable production project, the marble tiles pattern is rich in variety. But some advantages are also a shortcoming. Hard kitchen tiles make feet feel less comfortable, and smooth ground makes people slip easily.

Imitation wood flooring is modeled on the appearance, size and luster of solid wood flooring. Wooden floor has the advantages of health, environmental protection, beauty and comfort. But better than wood flooring, its raw materials are easier to get than wood flooring, the price is relatively low, more economical and practical. The processing process is more, making the imitation wood floor pattern more style, and strengthening durability, but also overcome the shortcomings of the wooden floor is not good to handle. Although the imitation wood floor has many advantages, but the human factors are not controllable, the harmful substances in many imitation wood floors on the market are beyond the standard, and the security and the difficulty of choosing are added invisible.

The imitation wood floor tile has both the beautiful appearance of the wooden floor and the hard and clean tiles. This kind of floor tiles are not only the advantage of imitation wood flooring and tiles, it also combines modern high-tech and traditional handicraft art, which makes the wood floor tiles application more extensive, style more fashionable and generous, combination and collocation effect is more significant.

The maintenance misunderstandings of tiles.

In our life, a lot of people, because of different hobbies, will use different ways to maintain the things in the home, of course, include the maintenance of marble tiles. But the sad thing is that many people, in the misunderstanding of maintenance, still think that their maintenance is correct, BARANA exposes the maintenance misunderstandings, can let us avoid such maintenance methods.

For the more stubborn and difficult to remove dirt, many people choose to remove the method is also different, a lot of people see stains on the tiles design surface, the strong acid cleaning stains, so that the tiles price surface is corroded to lose luster, sometimes stains still in the interior of the tiles surface. Sometimes the stain is cleaned with acid, but it will soon be dirty and easier to seep. The use of acid to remove stains is a quick and effective method, but it is easy to use or not be used by professional people, especially in the polished tiles. Otherwise, it is easy to destroy the gloss of the polished marble floor tiles.

Maintenance of tiles, many people choose wax, wax is also a certain skill. Many people think that wax can protect floor tiles better because they lack professional knowledge, but they do not know a mistake in tiles maintenance. Especially for the polished tiles, it is found that the surface of the polishing tiles have a stain on the surface of the polished floor tiles, and then the wax is reproduced immediately, and the original wax is not removed, so that the polished tiles will lose its gloss.

In the use of tiles, a lot of people will feel that the more dry the better the kitchen tiles, especially after the new decoration, we can see in many decoration experience, wall tiles after the end of the window to speed up the wind speed. However, it ignores the fact that bathroom tiles should also be locked in moisture. When the wall tiles design are dried, it not only needs moisture, but also more importantly, it must lock the moisture and ensure that the moisture does not drain. Daily mopping is also a way to conserve moisture.

For the more stubborn dirt on wood tiles, a lot of people will use some small tricks when they can’t get rid of them, such as cleaning agents and decontamination ointment. This kind of complex is correct. But some people will use the steel ball, think of the dirt removed, scratches can be solved, in fact, the practice is wrong, scratch no way to make up, and will also affect the gloss of cement tiles. In the maintenance period, waxing ceramic is a must to do. Before waxing, we must clean the glazed rustic tiles and choose the right products to wax the wood marble tiles.

How to do the problem of empty tiles in tiles?

In modern home decoration, the application fields of wall and floor tiles are more and more extensive. However, for a variety of reasons, after the use of wall tiles for a period of time, often occur local wood tiles and even fall off, not only affect the use effect, but also to the whole wall and the ground to leave a piece of ugly “scars”.

If the sand pulp is not loose, only the bathroom tiles are shedding, and the mortar that adheres to the back of the kitchen tiles can be scraped, and a little cement is mixed into the 107 glue, and a thin layer is evenly coated on the back of the cement tiles, then the tiles can be pressed together later.

If the sand pulp falls along with the tiles design together, after a slight chisel on the original base, the sand pulp with 107 glue is set up, or the cement, E 44 epoxy resin, acetone, and ethylene diamine chemical shop are mixed with the proportion of 5:3:2:1, and brush a layer on the base surface with the brush, and then the shedding tiles price are pressed up until the sand pulp is hardened.

It should be noted that if tiles are partially shedding, they must not pound the sand on the foundation surface to prevent the original marble tiles from being broken. It is required that the cement slurry binding layer should be evenly brushed and the brushing time can not be too long, so as to prevent the wind from drying and harden, resulting in the separation of the surface layer from the base layer and causing the drums to rise.

Strictly mix the sand mixture according to the ratio, and do not add any water. The mortar must be dry and hard, and the thickness should be controlled at 2-3 centimeters. When paving the flooring tiles, clean the back floating dust, moisten and moisten, and ensure the good bonding. When the floor tiles design are laid, the four corners are pressed with strength to make it contact with the pulp parallel, and the drawing line is 2-3 centimeters high. Then the hammer or the rubber hammer is struck, and the face is leveled with a horizontal ruler. After paving one tile, it will be pasted in two directions. If there is any subsidence phenomenon, the polished tiles should be lifted and paved with mortar.

In home decoration, it is necessary to deal with strong electric (lighting, electrical appliances) and weak lines (television, telephone, audio, network, etc.) buried wires, and wires are very important. Selection of wire specifications: family decoration, according to the national regulations, lighting, switch, socket to use 2.5 square wires, air conditioning to use 4 square wires, water heater to use 6 square wires.

The construction principle of water and electricity is that the top can not walk, the top can not walk, considering the wall, the wall can not walk, only to consider the ground, the line of the top is inside the ceiling or the plaster line, even if there is a fault, the repair is also convenient, and the loss is not great. If all of them are gone, overhaul will guide the floor to lift up. The ground is concrete structure. To bury the pipe, it will damage the concrete layer and even the reinforcement.