Posts

How to Clean Grout Using Natural Products?

If inhaling bleach and other harsh chemicals in order to clean grout doesn’t appeal to you, you do have an alternative method that is equally effective. Although you still need to put a little muscle into cleaning your grout you won’t be let down by the cleaning power of Mother Nature.

Cleaning the Tiles. Clean the tiled area. Remove any excess debris from the floor or counter area before attacking the grout. Use warm water and mild dish soap when cleaning counters or backsplash areas. Sweep floors and remove excess dirt and debris, concentrating on the grout area.

Cleaning the Grout with Vinegar. Attack the grout using a milder approach. Start with the easiest product first; you may be able to take care of the problem with just a little vinegar and water. Or, consider mixing vinegar with club soda instead of water. Combine half a part of white vinegar with half a part of water (or club soda) in a spray bottle or cup.

Pour or spray directly onto the grout and scrub. Allow the compound to sit before wiping away the vinegar and water. Cleaning the Grout with Baking Soda or Salt Add baking soda or salt to white vinegar/water (or club soda) mixture if stain or grime has not lifted. Add two parts baking soda to the vinegar/water mixture to create a thick paste. Apply the baking soda/white vinegar/water (club soda) compound directly to grout. Allow to sit on the grout for up to 15 minutes.

Scrub well. Wipe away the paste as you work to see if the solution worked. Cleaning the Grout with Oxygen Bleach. This method should work when the other methods aren’t cleaning adequately. Turn to oxygen bleach (Oxy) if all else fails. Create a thick paste using water and/or club soda and apply to grout (the same way you applied it with the banking soda paste). Wait 15 minutes and then scrub. Wipe away with a clean cloth as you work.

The Knowledge of Saw Cut Tiles

Wipe away the marker and use a rubbing stone to smooth the edges tile. Use a clean, damp cloth to wipe away the washable marker. The glass tile piece will be sharp and possibly a little rough, so take a rubbing stone, hold it at a 45 degree angle to the front of the tile, and rub it in a parallel motion over the edge to round and smooth it out. Rub the rubbing stone down the whole length of the edge. A rubbing stone can also be used to buff out any small irregularities in the break.


Turn on the saw and let it run for 15 seconds. Give the saw a chance to warm up and get going by turning it on and allowing the water to flow freely over the blade of the saw. Wait about 15 seconds before you begin cutting so you can be sure the saw is functioning properly and the water is flowing smoothly. Warning: If the water isn’t flowing, don’t cut with the saw! The friction could cause the glass to shatter and the blade could heat up and damage the saw.


Line up the cutting guide on the wet saw and the guidelines on the tile. The wet saw will have measuring or cutting guides that will lock the glass tile in place. Use the guide on the wet saw and match it up to the lines you drew on the tile with the washable marker, then slide the guide to lock the tile and keep it from moving. Align the saw carefully, because you won’t be able to undo a cut once you make it.


Push the tile through the saw and away from you. Feed the tile slowly through the saw with a light but consistent pressure as the blade cuts through it. Push with your hands on the edge of the glass away from the blade, keeping your movement continuous. Push the tile through the saw until it cuts all the way through for an even cut and a smoother edge.


Turn off the saw and wipe away the washable marker. When you have finished cutting your glass tile, use a clean cloth to wipe away the washable marker guidelines. Power down the saw and wait for the blade to stop spinning completely before you pick up or handle the saw. Wipe up and dust or glass pieces that may be on your saw or workstation.

Bathroom Decorate Knowledge


Use small shims or other spacers to allow a small amount of space between the bottom of the tile and the lip of the shower pan. Small pieces of cardboard work great as makeshift shims. After the mortar is set, you can simply remove these shims and caulk between the lip of the pan and the bottom of the tile.

Continue laying the tile, making sure to use spacers in between tiles. Spacers will leave you identifiable grout lines between tiles. Small 1/16″ or 1/8″ spacers (or even bigger) can be placed at several places on the x- and y-axis of the tile to leave adequate space for an even grout line.

Repeat the procedure, setting each row of tile on top of the last row of tile. Continue until you reach the top of the shower stall. Measure up from top of the last row. Mark the line with a level as a guide for your next row. Spread thin-set onto your tiles with v-notched trowel and place the tile just below the marked line. Use spacers all around.

Make sure to measure every third or fourth row to ensure that you have an even grout line. Let the tile set for 48 hours. This will make sure that the mortar has adhered properly to both the tile backing and the cement board backer. Do not use tile nippers made from slate. You can use them on ceramic tiles, however. You can also use a wet saw to make basic cuts on most tiles.

Cut the tiles while they are still on the mesh. Using your sketched line as a guide, cut the tiles down to the right size. A wet saw should do the trick for most tiles. If the tiles are smaller than 1 or 2 inches (2.5 or 5.1 cm), a pair of tile nippers may work better. The tiles should fall away from their mesh backing as you cut them. If they don’t. cut them away with your box cutter.

How Cutting Standard Tiles?

Lay out your tiles on the counter, table, or floor. Make sure that your tile lay out matches the dimensions of your wall. For example, if your backsplash is 6 to 2 feet (1.83 to 0.61 m), then your tile lay out should also be 6 to 2 feet (1.83 to 0.61 m). Include the tiles that will get in the way of cabinets, corners, and edges. You will cut these down to size later. Also, remember to include the grouting gaps between the tiles; use a spacer if you have to.

This step is known as “dry-fitting.” It will help you figure out whether or not you need to cut any tiles. Leave a 1⁄8-in (0.32-cm) gap around the backsplash, where it connects to the cabinets, counter, and adjacent wall. If you are working with a large sheet of tiles, click here to continue.

Mark the tiles that will get in the way of cabinets and corners. Check the dimensions of your wall against your laid-out tiles. Use a marker to make a mark across the tiles where they will bump against a cabinet or corner. Mark the tiles that will be along the top edge of your backsplash, next to a wall, or under a cabinet. They will be more disguised that way.

Put on some eye and respiratory protection. A pair of safety goggles will protect your eyes against any flying pieces of tile. A good respiratory mask will prevent you from breathing in any sanding dust. Most masks are graded based on the type of particle they can filter. Choose one that can filter dust particles.

Use a score-and-snap tile cutter on large tiles. Use the cutting wheel to make a single, deep score in the tile. Snap the tile along the scored line. If the tile has a mesh backing, make sure that the mesh side is facing up. Do not use grinders on tiles made from slate. You can use them on ceramic tiles, however.

How to Removing Stains With a Stone Tile Shower?

Investigate the location of the stain. This can provide useful information for what caused the stain. Certain cement tile stains will need special cleaning procedures to be removed from the stone. Note the color, size, shape, and pattern of the stain, along with anything in the area that might have caused it.

Cleanse oil based tile stains with a household detergent or ammonia. Some common examples of oil based wood tile stains include grease, tar, or cosmetics. These will cause your bathroom tile to darken. To dissolve oil based mosaic tile stains, clean the area by gently wiping it with a soft cloth and a household detergent, like dish soap, or ammonia. Afterwards, dry the area with a soft towel.

If detergent and ammonia fail to remove the stain, try mineral spirits or acetone. Use these sparingly and as a last resort. Flush these cleaners with water after applying, then dry the area. Eliminate mildew and algae with a heavy-duty cleaner. Mix a diluted cleaning solution containing a half cup (237 ml) of ammonia, bleach, or hydrogen peroxide with a gallon (3.8 L) of water. Clean the surface with the solution with a soft cloth, rinse the area well, then dry it with a soft cloth or towel.

Never mix bleach and ammonia. Doing so will create toxic fumes that can result in serious harm or death. Erase organic marble tile stains with hydrogen peroxide and ammonia. The most common kinds of organic casstle tile stains come from bodily fluids, like urine or feces, tobacco, paper, and food. These may create a brown-pink stain. Clean these areas as you would normally with 12% hydrogen peroxide and a couple of drops of ammonia.

In some cases, you may be able to get rid of an organic stain just by removing its source. After removal, wait a few days to see if the stain disappears. Hydrogen peroxide may fade or lighten the color of your stone. Test it on an out of sight location before you use it. Only use this technique occasionally to prevent color loss.

Use a stone poultice for metal wood tile stains. Mix the poultice according to its directions. Usually this will result in a paste that is the consistency of peanut butter. Wet the stain with distilled water. Apply the paste to the stain so it is roughly ¼ to ½ in (.64 to 1.3 cm) thick. The paste should extend beyond the stain by roughly an inch (2.5 cm). Tape plastic over the poultice, wait the time indicated on the label, then remove it according to its directions.

The Knowledge Before Install Floor Tile

Installing a tile floor can be time-consuming work. For those on a busy schedule, it can take a week to get the whole project accomplished. However, the process itself is straightforward and the end result is well worth the effort you put in. See Step 1 for more information on how to do DIY tile layout with minimal experience and lots of fun.

Laying Down a Cement Board. Install cement board first if you’re dealing with just a subfloor. While it’s possible to lay wood tile directly on plywood subfloor, it’s certainly not recommended. Plywood subfloor won’t bond as surely with thinset as cement board will; neither will it provide as even and stable of a surface for the common marble tile. Cement board will probably be a bit more expensive and will add time to your project, but the investment is totally worth it. Tile done right requires a solid substrate.

The cement tiles in mortar and grout is a serious chemical and you need proper safety gear. Cement can cause first degree burns, eye injury from dust or wet cement getting into your eyes and also can sometimes cause lifelong chromium sensitization, so be safe EVERY time and wear alkali-resistant waterproof gloves, long sleeves and long pants (unlike the pictures in this article, which don’t follow proper safety guidelines!) and waterproof or thick shoes. Wear goggles with side protectors and a ventilator at LEAST when pouring mortar to mix it, preferably throughout the project – remember, if mortar gets into your eyes, even once, you’ll have to flush with water for 20 minutes and may need a trip to the hospital. Don’t wash mortar off with normal soap (special pH neutral soap can be used). Make sure there’s nowhere mortar can get inside and get trapped against your skin. Rinse any mortar that touches your skin off right away, and keep vinegar on hand to neutralize.

Lay down some latex-modified thinset mortar onto the subfloor.If you’re mixing mortar from scratch, add enough water to the dry mortar so that the final consistency resembles peanut butter. Then, let the mortar slake, or rest, for 10 minutes. Use a trowel with notches about the same size as the cement board thickness to lay down the mortar. Lay only enough mortar that you can safely cover in about 10 minutes. This is the time it will take the mortar to start hardening.

Press down the cement board onto the subfloor and attach with cement board screws. Starting in one corner, press the cement board down to the subfloor using your own weight. Drill the cement board screws into the board to fasten the board to the subfloor. Screw about every 8 inches (20.3 cm) around the edge of the board and every 10–12 inches (25.4–30.5 cm) in the center of the board.

Continue laying mortar and cement board onto the subfloor, staggering the end joints so that they don’t line up. For added strength, make sure that the end joints don’t form one continuous line. This means that you might need to lay one line of cement board starting on one side of the room, and then start the next line on the opposite side of the room.

What Should We Pay Attention When Remove Bathroom Floor Tile?

Remove the marble tiles without removing the substrate.If the material beneath the wall tiles is in good condition, you can save yourself some money and leave it intact. That said, this method is slow and often causes some damage to the substrate; use your best judgement. Remove the tiles design with a flat pry bar, placing the edge low against the side of the tile and striking the base of the knife with a hammer. An electric chisel is another option. Periodically scrape adhesive off the exposed floor with a putty knife or a floor scraper.

If the ceramic tile only breaks in tiny pieces, or if you want to maximize the chance that the small tile comes out intact, scrape out the grout lines around the flooring tiles first. You may use a handheld grout saw, a carbide blade fitted onto a rotary grinder or oscillating tool, or (less effectively) a utility knife with several spare blades. A little heat from a blow dryer or heat gun may soften the grout.

Saw through plywood or cement board substrate. Chip away a row of white tiles to expose this substrate. Fit a reciprocating saw with a long blade (wood-cutting or carbide-tipped masonry cutting, depending on the material). Cut into the side of the substrate at a low angle, making a long cut to free it from the floor beneath. You can now lift the material and tile up in chunks with a flat bar. Cutting through cement board may damage the floor beneath, and roofing nails may interrupt your progress. A safer, but slower alternative is to break through the cement board with a hammer. You can then pry the cement board off the floor beneath using a pry bar.

Remove the mortar bed. Floor tiles from the 1960s and earlier were often installed on a thick mortar bed. Mortar beds were typically installed in areas where the floor was sloped for drainage, e.g., in shower areas. This is a pain to remove, but chiseling out the tiles is slow and will likely cause cracks in the mortar anyway, so it’s best to replace it now if you can afford it.

Most mortar beds are made of sand mixed with a small quantity of Portland cement tiles, and are not particularly difficult to break up. Shut off the house’s main water valve before you begin. Removing the mortar bed may damage a water pipe. Break through a small area with a chisel and sledge to the surface beneath (usually wood). Using a rotary hammer with a chisel bit (from a tool rental company), chisel around a chunk of mortar about 1 foot (0.3 m) across. Use caution when approaching the base of the bed. Complete the job by using the hammer between the wood and the mortar bed, periodically chiseling the mortar from above.

How to Remove Bathroom Floor Tile?

Removing ceramic tiles is a time consuming job, especially if you’re trying to preserve them for reuse elsewhere. If your tiles are only chipping off in tiny pieces, you may need to spend more time scraping out grout, or switch to power tools instead of a hand chisel.

Protect fixtures and usable floor with drop cloth. Remove all unnecessary objects from the room. Cover bathtubs, counters, mirrors, and other fixtures with a drop cloth to protect them from flying pieces of tile. Carefully cover any drains with painter’s tape. Lay down drop cloth over any part of the floor you plan to keep as well. For hygienic reasons, clean the bathroom thoroughly before you continue.

Remove the toilet, if necessary. If the toilet (or a pedestal sink) is covering the tile, turn off the shutoff valve on the water supply line. Flush the toilet until the tank and bowl are both dry, finishing the job with a hand-operated pump, then a sponge. Detach the tank using a wrench. Set the tank and the toilet aside on old towels or other absorbent materials. Leave the tank and bowl attached, and remove both at once.

You may need to rock the toilet back and forth to break the caulk, or cut away the caulk with a utility knife. Carefully remove the wax ring that creates a seal between the base of the toilet and the drainage pipe. You may wish to wear gloves during this process, since the wax ring is very sticky. Clean any remaining wax off the base of the toilet with a rag soaked in mineral spirits. You will need to replace the wax ring with a new one when you re-install the toilet. Consider retrofitting your toilet with a wax ring that comes with an extension to accommodate higher flanges. After removing the toilet, plug the hole with a rag to block sewer gases.

Put on safety equipment. Wear heavy-duty gloves, wraparound safety goggles, and long sleeves to protect yourself from sharp tile pieces. Wear a dust mask to protect against dust from pulverized tile. You should also wear work pants, a hat, and work boots. ceramic tiles and mortar commonly contained asbestos until the 1980s in the US, and the 1990s in some regions. Test old tiles design and mortar for asbestos and, if asbestos is found, hire a professional to remove the small tiles safely.

Even modern cement tiles often use lead glaze, which creates lead dust during removal. One tile removal project is unlikely to cause dangerous exposure, but to be on the safe side, ventilate the bathroom to the outside, and wash skin and clothes after completing the project. Buy a respirator mask rated for lead dust if you expect repeat exposure.

Break through the first tile.Use a cold chisel and sledgehammer to break apart one tile, and deposit the pieces into a bucket. This will give you a look at the subsurface, which can help determine your approach. Read through the rest of this section before you decide how to continue. If you want to preserve as many tiles intact as possible — which is difficult and time-consuming — first cover the center of the tile with masking tape and drill several holes through it with a carbide-tipped drill bit. This will reduce the number of flying pieces that can chip nearby tiles.

How to Install Marble Floor Tile?

Place the marble tiles in the pattern. Place your tiles within the grid you have created. This dry-run allows you to identify areas where you will need to cut floor tiles to fit and will help you determine the best place to start laying the tile based on your pattern and the shape of the area you plan to tile. If the gap between the last complete tile and the wall is less than 2 inches (5 cm) then you should move the center tile over. This makes the strip of tile in this area wider, which will look nicer when you lay your tiles design.

Apply a layer of thin-set adhesive on the floor surface using a notched trowel. Be sure to wear heavy-duty work gloves and work one section of the floor at a time. The adhesive should be thick enough that you can use the notched edge of the trowel to make grooves in the adhesive without showing the floor below, but thin enough that it does not push up between the cement tiles. The grooves ensure that the adhesive spreads evenly on the back of the wall tiles. Choose the adhesive recommended for your type of marble. Ask at the location where you purchase your tiles about the proper adhesive to use.

Lay wood marble tiles firmly in the thin-set adhesive. Lay the wood tiles on top of the adhesive within 10 minutes of applying the adhesive. Be careful not to slide the small tiles into place or get adhesive on the top of the tiles. Sliding the tiles into place will push up the adhesive and make the tiles uneven, causing them to crack. Adhesive will be difficult to remove from the tops of the tiles.
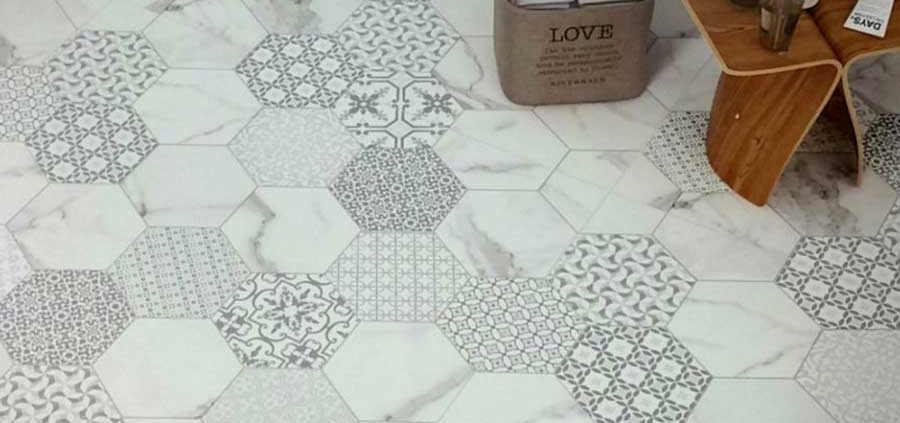
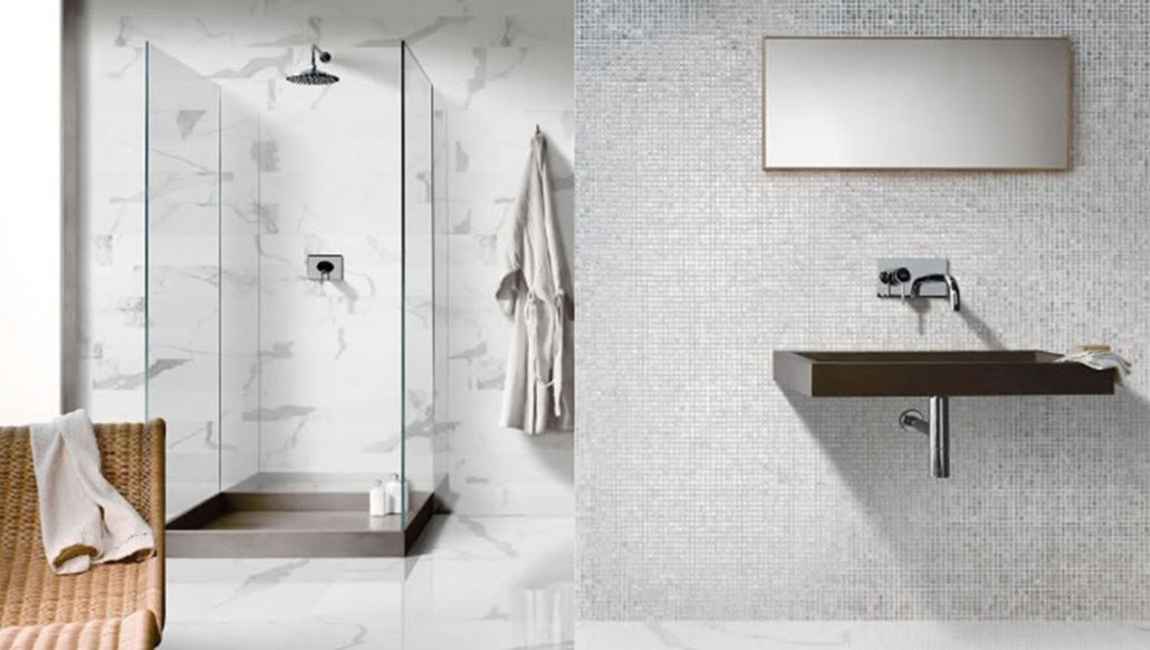
Position the tiles in place using spacers.Use spacers to create the correct spacing between the ceramic tiles and keep them even with straight lines along the rows and columns. You should use 1/8 inch (3 mm) marble tile spacers. Spacers help ensure proper placement of the tiles.

Check the level of the tiles.Check the level of the tiles to ensure that no edge “lips”, or rises above the rest of the tiles. Take a length of wood and lay it across the tops of the common marble tiles, using a hammer to lightly tap the wood down. This ensures that all the tiles are at the same level. Use the piece of wood in both directions along the grid to make all the tiles exactly the same level.

Measure the dimension of any partial tiles needed by placing one tile on top of the full tile closest to the wall.Place another tile against the wall so that the edge of the second tile lays on top of the first tile. Score a line in the first tile using a utility knife to mark your cut line for the correct width of tile needed.

Use a wet saw to cut the tiles to fit in the edges along the walls or special spaces.In order to minimize the risk of tiles breaking when they are being cut, saw three-fourths of the length of the tile, turn the tile around and then cut the remaining length. Repeat the process until you have cut all the specially sized tiles and placed them into the adhesive. You can usually rent a wet saw for a day from a local hardware store or tool rental company.

Remove any excess adhesive between the tiles.If you have put too much adhesive beneath the tiles or push the tiles down too hard then it can push up between the tiles. If this has happened then you must take a small knife to cut out these extra bits. Leave tiles undisturbed 24-48 hours to allow adhesive to dry completely. Different adhesives take different lengths of time so check the adhesive instructions for the proper drying time. Do not step on the tiles during this time or else you can make them uneven.

Using Heavy-duty Bathroom Tile Cleaners

Mix water and bleach to clean marble tile. Combining bleach and water in a 1:3 ratio will yield an effective tile-cleaning solution. For instance, you might mix five tablespoons of bleach with 15 tablespoons of water. Fill a spray bottle with this solution and spray it on the bathroom tile you wish to clean. Rinse the tiles design clean with a cloth dampened with warm water. Bleach exudes noxious fumes. Open doors and windows before you get started to prevent the fumes from building up. Bleach can also irritate the skin, so wear thick rubber cleaning gloves when cleaning your bathroom tile with it.

Utilize ammonia. Combine ammonia and water in a 1:2 ratio. For instance, you could mix 10 tablespoons of water with five tablespoons of ammonia. Fill a spray bottle with the mixture and apply it to the bathroom tile you want to clean. Let it sit on the bathroom tile for about 60 minutes, then wipe it away with a clean, damp cloth. Ammonia, like bleach, exudes noxious fumes. Ventilate the bathroom you’re cleaning by opening doors and windows. Additionally, ammonia can irritate the skin, so wear thick rubber cleaning gloves when cleaning your bathroom tile with it.

Use a steam cleaner. A steam cleaner is a cleaning machine that uses steam to clean tiles floors and other flat surfaces. Generally, steam cleaners work the same way that vacuum cleaners do – simply turn the machine on and push it along the surface of your bathroom tiles. You’ll probably have to fill the steam cleaner with water before using it. Consult manufacturer directions before using your steam cleaner. You may be able to rent a steam cleaner at your local hardware or home goods store.

Make a baking soda paste. Combine baking soda and water in equal amounts. For instance, you might mix three tablespoons of water and three tablespoons of baking soda. Use a stiff-bristled brush to wipe the paste onto the grout. Work the paste into the grout, then wipe it away using a damp cloth or sponge. Create a salt and vinegar cleaning agent. Combine one cup (237 milliliters) of plain white vinegar, one cup (273 grams) of salt, two tablespoons of liquid dish soap, and one cup (237 milliliters) of hot water. Dab a sponge in this mixture and wipe your bathroom grout with it. Wait ten minutes, then wipe the grout with a clean, damp sponge.

Scrub the grout with bleach. Dip a stiff-bristled grout brush in bleach. Scrub the along the grout using the brush. After scrubbing, rinse the grout with a clean, damp cloth. Throw open the windows and door before you get started in order to ventilate the noxious bleach fumes. Use a cotton ball to clean corner cement tiles. Cleaning corner tiles with a regular sponge or brush can be difficult. Instead, soak a cotton ball in the tile cleaner of your choice and press it into the corner you wish to clean. Wait several minutes then remove the cotton ball. Wipe the corner with a damp rag to remove any excess grime. Alternately, you could use an old toothbrush to scrub the corner area clean.

Apply a coat of wax to ceramic tile. Once annually, apply a coat of car wax after cleaning bathroom tile. This will cause water to roll off and prevent the growth of mildew. Plus, it gives your bathroom tile a nice shine. While the exact technique for applying the car wax varies with the specific wax you’ve chosen to utilize, you can generally dab a clean cloth in the tub of wax, then rub it in a thin layer across the bathroom tiles after cleaning. After applying the wax to bathroom floor tile, buff it down to prevent the bathroom tile from being too slippery.