Posts

How to Cover Exterior Cinder Block Walls?

Cinder block walls are strong and inexpensive, but they aren’t always pleasant to look at. Fortunately, you have many options for improving a cinder block wall. Concrete is an inexpensive way to create a strong cover. Stucco is similar to concrete but more decorative. Vinyl panels and stone veneers are alternative decorations that match with many homes. Use different material to give any cinder block wall a unique aesthetic appeal.


Dampen an area approximately 3 ft × 6 ft (0.91 m × 1.83 m) in size, or as much as you can cover with cement in about 10 minutes of work. The wall needs to be well-soaked in order for the cement to bond to it. Always work on one part of the wall at a time to avoid any problems with the cement coating.


Spread a 1⁄4 in (0.64 cm) layer of cement on the wall. The cement needs to be applied in sections to prevent it from drying out before you’re finished working. To prevent issues, start out by covering the small portion you dampened. Scoop some cement out of your mix with a trowel, hawk, or another tool, then slather it over the area with a trowel. Start at the top of the wall, spreading the concrete from left to right.


A hawk is a flat tool used to pick up and hold lots of concrete, mortar, or other material. Normally you would have to dip into the mix many times. Using a hawk reduces this, making the application process much easier. For a faster way to cover wall sections, take advantage of a concrete sprayer.


Load the concrete into the sprayer, then hold it close to close to the wall to avoid spraying the areas you aren’t ready to work on yet. If you need to check the cement’s thickness, try using a tape measure on an open part of the wall. Repeat dampening the wall and spreading cement until you’re finished.

How to Decorate Cement Floors?


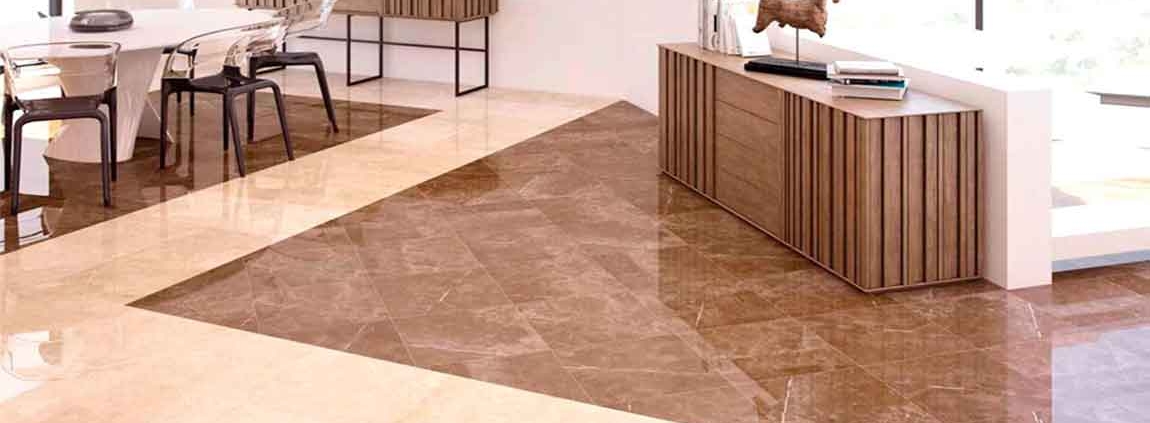
Concrete is an affordable flooring option compared with linoleum, vinyl, ceramic tile or carpet. It is easy to maintain and anti-slip for safety in your home. Cement flooring doesn’t have to be dull-grey, you can decorate your flooring to match the design of your home or work. By staining or painting your floor you can have a stylish new look for less!


Apply sealer to the larger surfaces with a roller. Once the edges are finished you can apply a sealer to the remainder of the area with a roller. This will make the application quick and easy for you. Make sure that your roller is clean. Dirt will stick to the wet surface and be hard to remove once the sealer dries.


Wait for two hours before applying the second and final coat. The sealer will need two coats to protect your stained surface. Once the first coat has dried, apply the final coat with a paintbrush for the edges, and then a roller. Apply a sealer every 3 to 4 years to ensure the long life of your concrete stain. If applied correctly, the seal you’ve placed on your stained surface will last for 3 to 4 years.


Wait 24 hours before placing anything on the stained surface. After 24 hours, only use the area for light activities. Any pressure on the surface can damage the stain. For any vehicle traffic on the surface wait 72 hours. Then cover the whole surface with a roller. This will give your cement floor a clean and smooth finish.


Make sure your tools are clean when applying the final coat. It is important that there is no dirt on the surface to get the cleanest finish. Hence, some of the base colour should also show through. The only brush strokes should be fine ones to soften the look as the paint is still wet.

How Choosing Pool Tile by Style?

Use larger tile for easier upkeep. Save time cleaning your pool tile by having a larger tile finish, which has fewer seams that can collect dirty buildup. Go with smaller tile to create a captivating design. Add dimension to your pool by using smaller tile, which makes pool designs look more intricate.

Creating a mosaic or tile image is easier to do with small tile than with larger tile. Opt for blue tile for a classic swimming pool look. Incorporate multiple hues of blue into your design to add depth to your pool and make it more interesting. Use one shade of blue for a clean, uniform appearance.

Match your tile color with a color from your home for a unique pool design. Use red tile to complement the red brick on your house, or go with a green tile that blends with the surrounding landscape. Using a tile color other than blue will immediately make your pool stand out.

Mark the last tile in each row to indicate where to cut it if needed. As you near the edges of the room, you may find that you don’t have enough space to set the final tile. When this happens, you’ll need to cut your end tiles to ensure a proper fit. Measure the distance between the last full tile you laid down and the wall and mark this measurement on the end tile. You can cut the tile later using a masonry saw.

If the space left over at the end of a row is especially narrow, pick up the rest of the tiles in the row and shift them down half a tile’s length towards the opposite wall. Adjust your other rows accordingly. That way, you’ll have a larger partial tile at either end rather than a tiny sliver visible along only 1 wall.

How to Clean Tile Floors with Vinegar?

The right floor tiles can lend a look of subtle sophistication to almost any room in your home—until they get dirty, that is. After a while, dirt and mildew can begin to build up on the surface of textured tiles and down in the grouting, leading to unsightly discoloration. Cleaning floor tiles can also be a tricky task, as many types of cleaners can inadvertently fade or damage porous materials like natural stone. Luckily, there’s a convenient solution sitting right in your kitchen. With just a bottle of ordinary vinegar and a little determination, you can clean and polish your tile flooring, extending its lifespan and leaving it looking like it was just installed.

Talk to your local hardware store about the trowel size that they would recommend for your particular project. Usually, glass tiles come in sheets and trowel with smaller notches will be needed. However, if you are using larger glass tiles that are not in a sheet, the average 3/8″ trowel will probably be better.

Lay your tiles. With the mortar in place, you can start setting out your tiles or tile sheets. Simply press them firmly into the mortar; push it solidly against the surface but remember that it’s not toothpaste. You don’t want to push the tile so that you disturb the mortar. You just want to get the tile to stick. Try to start in a corner or against a wall, to cut down on the amount of cutting and sizing that you need to do. Insert tile spacers between the tiles or tile sheets as you go.

If you are using tile sheets, you can cut the sheets as needed to create a sheet of any size or shape for your project. You can also cut out the middle of a sheet in order to make space for outlets. Simply use a utility knife to cut the mesh backing.

Cut tiles as needed. You will likely have a space that does not perfectly fit the tiles that you have, create a need for only a portion of a tile. In order to fill these gaps, you will need to cut the tiles to size. You will need to use a wet saw with a blade designed for glass in order to cut glass tiles. Be very careful and keep your fingers as far away from the blade as possible.

How Using an Acid Solution Washing Your Pool Tiles?

Drain your pool. Remove debris like leaves and algae from the bottom of the pool once the water is drained. Then place your water hose at the deep-end side of the pool. Position it near the ledge so that the water will run over the tile when you turn it on. Wear protective clothing.

Because the acid solution emits noxious fumes and is harmful if it gets onto your skin and body, rubber boots, safety gloves and goggles, and a respirator with an acid approved filter are necessary. For extra precaution, wear a protective suit that is chemical-resistant.


Add 1 gallon (3.8 liters) of muriatic acid to 1 gallon of water in a bucket. You can use a plastic bucket. Make sure to slowly add the acid to the water and not the other way around. Because the acid will fizz and emit fumes when you pour it into the water, make sure you are wearing your respirator, goggles, gloves, and protective clothing. You can purchase muriatic acid and acid-resistant cleaning tools from your local pool maintenance store or online.

Apply the solution to the pool tile with an acid brush. Starting at the deep end of the pool, work the solution into the grout with the brush. Working on small sections at a time, scrub the flat rustic tile with an acid-resistant scrub brush. Once the calcium silicate scaling is removed, rinse the wall tile with water using the hose.

Alternatively, fill a watering can with the solution and use the can to pour it onto the pool tiles. Then use the acid-resistant scrub brush to clean the white tile. Repeat this process until all the tiles are cleaned. Add soda ash to the acidic solution at the bottom of the pool. Add 2 pounds (.9 kilograms) of soda ash for every gallon of acid. Do this once you are done cleaning all of the tiles. The soda ash neutralizes the acid so it can be safely removed from your pool.