Posts

How to Clean Quartz Tiles?

Quartz is a popular material for kitchen tiles and tables. It’s scratch-resistant, antimicrobial, and easy to clean. However, it’s not stain-proof or scratch-proof. Whether you have a quartz tiles or are thinking of installing one, you’ll need to know how to safely perform daily cleanings, tackle stains, do twice-yearly deep cleanings, and make a poultice for especially tough stains.


Wipe down the tiles. Use a clean soft cloth to avoid scratching the surface. Mix equal parts warm water and dish washing liquid. Dip the cloth in the soapy water and wring out the excess. Wipe the surface using gentle counterclockwise strokes. Dry the surface with a clean nonabrasive cloth. Even if you don’t soil the tiles, wipe it down every day to keep it in good repair.


Fight grease with degreasing cleaner. You can buy this product in grocery stores or big box stores. Stick to a product labeled safe for quartz surfaces. Spray the cleaner on a clean nonabrasive cloth. Clean the tiles in a gentle counterclockwise motion. Rinse the surface immediately. As an alternative, you can use disinfectant wipes that don’t contain bleach.


Scrape away hardened spills. This includes egg, nail polish, and similar substances. Use a blunt plastic scraper to tackle these substances. Aim for the underside of the mess, scraping away from your body. Use warm water before anything else. Soak a clean nonabrasive cloth with warm water. Wipe the stain in a gentle counterclockwise motion. Use a clean soft cloth to dry the affected area.


Remove permanent marker with rubbing alcohol. If warm water doesn’t work, wet a cotton ball with isopropyl (rubbing) alcohol. Rub the stain in a gentle counterclockwise motion until the stain disappears. Dry the area with a clean soft cloth. Tackle wine with a magic eraser. Wet the magic eraser under a stream of warm water.

How Doing Daily Cleanup of Marble Tiles?

Wet the surface of the tiles. Run a clean, damp cloth over the surface of the cultured marble tiles to slightly wet it. This helps you avoid damaging the glaze that gives it its shine when you apply the soap or cleaner. If the surface already has lingering water, such as from a shower, you don’t need to add more.


Apply a mild soap or all purpose cleaner to the surface. You can spray the soap or cleaner directly onto your cultured marble tiles, or you can dampen a clean towel and wipe it over the surface. Choose a water-based cleaner with a neutral pH. It’s the safest option for cleaning your cultured marble tiles without damaging the glaze or scratching the surface.


Wipe the surface of the cultured marble tiles with the rag. Make circular movements as you wipe away the soap or cleaner. If necessary, apply more soap or cleaner to the cultured marble tiles. Continue wiping with your cloth until the surface is dry. Use a soft cloth to avoid scratching or damaging the surface. Don’t use abrasive sponges or cloths.


If your cloth is very wet, switch to a clean, dry cloth to remove the remaining cleanser. Avoid using harsh chemicals, which can damage the surface. Harsh chemicals can damage the glaze on your cultured marble tiles, making it appear dull. These cleaners can also cause chemical scuffs and scratches on your cultured marble tiles. Stick to mild soaps and cleaners.


Rinse away the cleaning agent and polish the marble tiles, if desired. Fill your cup with cold water again. Pour it on the cleaned portion of your marble tiles and wipe up excess liquid and remaining dirtiness with a clean, soft, dry rag. After this, your counter should be clean. This method will remove dirt and debris but not grease.

How Selecting a Cleaner Based on Floor Type?

Use vinegar for most floor types. The majority of floors can be cleaned with a mixture of vinegar and warm water. Place a quarter cup of white vinegar in a 26 ounce (780 mL) water bottle to clean the following floor types:Cork, Vinyl, Porcelain.

Opt for a neutral pH cleaner for stone, hardwood, or bamboo floors. Hardwood, stone, and bamboo floors need a gentle cleanser. Purchase a mild to neutral pH cleaner at a department store. Apply it to your floor as directed on the bottle. Most pH cleaners are diluted with water. About a quarter cup of a pH cleaner (60 mL) mixed with water should adequately clean a bamboo or hardwood floor.

Do not mop waxed wood or laminate floors. If you have a wax wood or laminate floor, mopping is unnecessary. Such floors only need vacuuming and dry mopping to stay clean.

Use a steam cleaner for a very dirty floor. For the most part, you can wash your floor with detergent, warm water, and a rag, mop, or sponge. However, you can use a steam cleaning mop on some occasions. A steam cleaner is a special type of mop that automatically fills with water and your chosen detergent.

While steam cleaners are pricier, they tend to remove unseen bacteria better than a conventional mop and bucket. They may also remove set-in stains easier. If your floor is very messy, steam clean your floor with your chosen cleaner.

How to Clean Tiles?

Tiles are both stylish and practical. Unfortunately, over time, they can get greasy and dirty. To do a general floor clean, mop the porcelain tiles with water and a tile cleaner. If your tile splashback has greasy marks on it, use soapy water to the oil splashes. Clean the grout between your tiles with baking soda and vinegar to remove discoloration. These methods are quick and easy, and will leave your string stone tiles looking sparkling clean!

Sweep up any dust and dirt with a dustpan and brush. Use the brush to push any debris and dust into the dustpan. This avoids you spreading the dirt around the floor when you mop it later. If you don’t have a dustpan and brush, use a broom instead.

Mix water and tile cleaner in a bucket. Choose a tile cleaner that is designed for your type of tiles. For example, look for a commercial cleaner marketed as “ceramic-friendly” or “safe for stone floors.” Fill a mop bucket with water and add the tile cleaner, as directed on the back of the container.

Purchase tile cleaner from a cleaning store. Most tile cleaners require approximately 1 capful of tile cleaner per bucket of water. Avoid using citrus cleaners on stone as this can damage the tiles. Try not to use cleaners containing soap or detergent, as these can make your tile floors slippery. If you want to make your own tile cleaner, mix equal parts of vinegar and water in a bucket. This can be used on all types of tiles.

Wipe the cleaner over the calacata tiles with a mop. Dip the mop into the bucket of water and tile cleaner, and then squeeze out any excess liquid to avoid drips. Push the mop back and forth over the entire area until the calacata tiles are clean. Press the mop down firmly when cleaning any stained areas, as the tile cleaner and the pressure of the mop will help to remove the stains.

How Knocking Out the Tiles?

Locate a broken tile or section of loose grout. Look for pieces of tile that have chipped or are cracked around the edges. Another good place to start is at any spot where the grout has started coming loose. This is the spot that will be easiest to start removing the tile.

If there isn’t a chipped tile or loose grout, try to start loosening a tile at one of the ends of the floor, or hit the middle of the tile with your chisel so that it breaks. Hold a chisel underneath the loose tile at a slight angle. Try to situate the chisel under the tile at an angle of about 30 degrees so that you can easily lift it from the ground. Use a masonry chisel that’s about 1 in (2.5 cm) wide for best results.

Hit the chisel with a mallet to lift the tile from the floor. As you hit the chisel, the tile should begin to separate from the ground. Continue hitting the chisel until the piece of tile you’re working on completely breaks. The tile might not come off in one solid piece, so don’t worry if it splits and breaks into smaller pieces as you’re chipping away. A small sledge hammer also works instead of a mallet.

Continue removing the tiles using a chisel and mallet. Move on to the next piece of tile, situating the chisel under the tile and hitting it with the mallet. Repeat this process to lift the tile from the entire floor. Once you remove the first few pieces of tile, it’ll be much easier to maneuver the chisel underneath the next pieces. This process will likely take a while, so be patient and go slowly so that you don’t injure yourself.

Strike the top of the tile with the chisel if it’s not breaking easily. Place the end of the chisel right on top of the tile and hit the opposite end with the mallet. This should break the tile, making it easier for you to remove it at a new angle. Move the broken pieces of tile out of the way so that you can reach the attached pieces more easily.

How to Clean Tile and Grout?

This article details a way for tile owners to clean tile themselves. Cleaning floor tiles for the do it yourself is a difficult, but doable project if the proper steps are taken. Assemble the necessary tools. A grout brush that is made to go down into the grout while you are standing up. A hand held pump up sprayer (it does not need to be chemical resistant) A mop of some kind to remove the slurry you will create (or a wet/dry vacuum)

The proper alkaline or acid grout cleaner. Do not try to get the most aggressive acids or alkaline chemicals. Find an approved cleaner, perhaps at a local janitorial supply house. Mask areas you might be concerned with that could be harmed by chemicals. Stainless steel appliances need to be masked with plastic and taped. Carpet needs to be protected.

Sweep or vacuum area to be cleaned. Mix cleaning solution according to manufacturers directions. If you want to truly do your best you will use both an acid and an alkaline. If you have heavy grease use the alkaline first, if not use the acid first.

Apply solution to the grout joint and scrub with the grout brush. Use plenty of solution and let it dwell for at least 10 minutes, but do not let the solution dry. Add more if it is drying too fast, but keep it wet for 10 minutes at least. Your biggest advantage – beside using the correct supplies, is to let the chemical dwell. Dwell time is your friend.

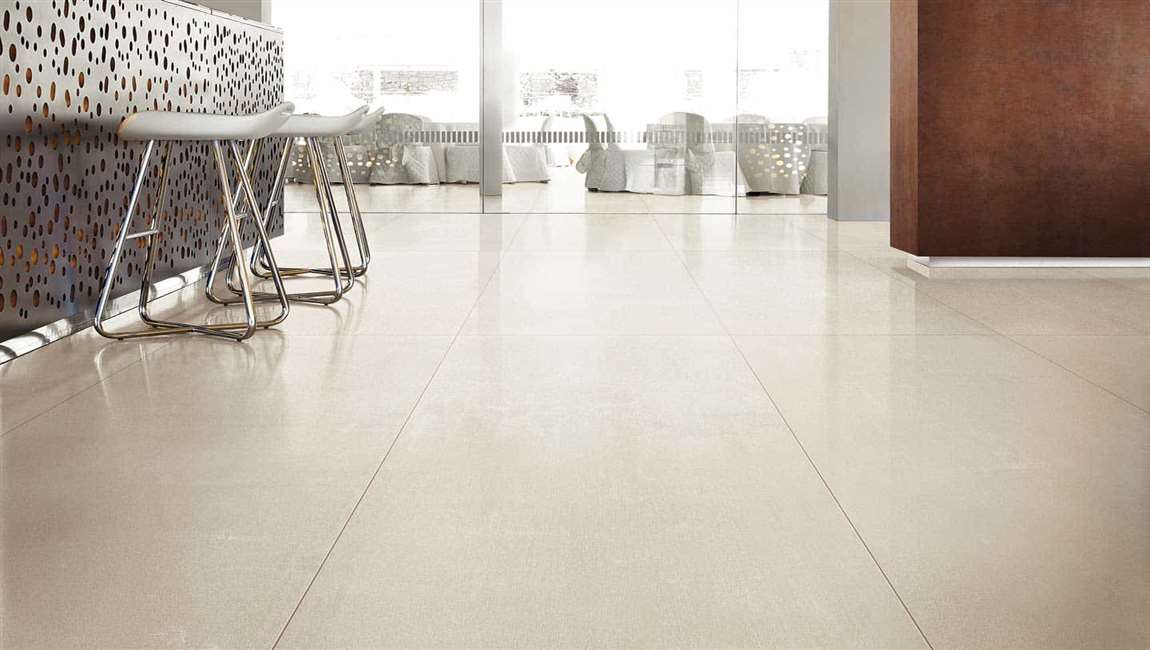
After 10 minutes mop up slurry with clean water. You may also use a wet vac to remove slurry. Additional agitation with grout brush may be necessary. We suggest using microfiber mops. Repeat process if you are using alkaline as well as acid cleaners.

When your grout dries, if it is really clean, you may wish to add a sealer. We recommend a water based sealer as they are easier to work with when applying to a grout joint. Take care not to get sealer on the tile as it can form a sticky residue that will attract soil to the tile. If it is not really clean we don’t recommend you seal it because you will be essentially sealing the soil you couldn’t get off under the sealer, and if you are able to get it cleaned professionally in the future it will hamper that person’s effort. Do not use a topical, acrylic, mop n glow or any product designed for vinyl. Find an application tool to apply the sealer, and apply it to the grout only.