Posts

How to Select Wood Flooring


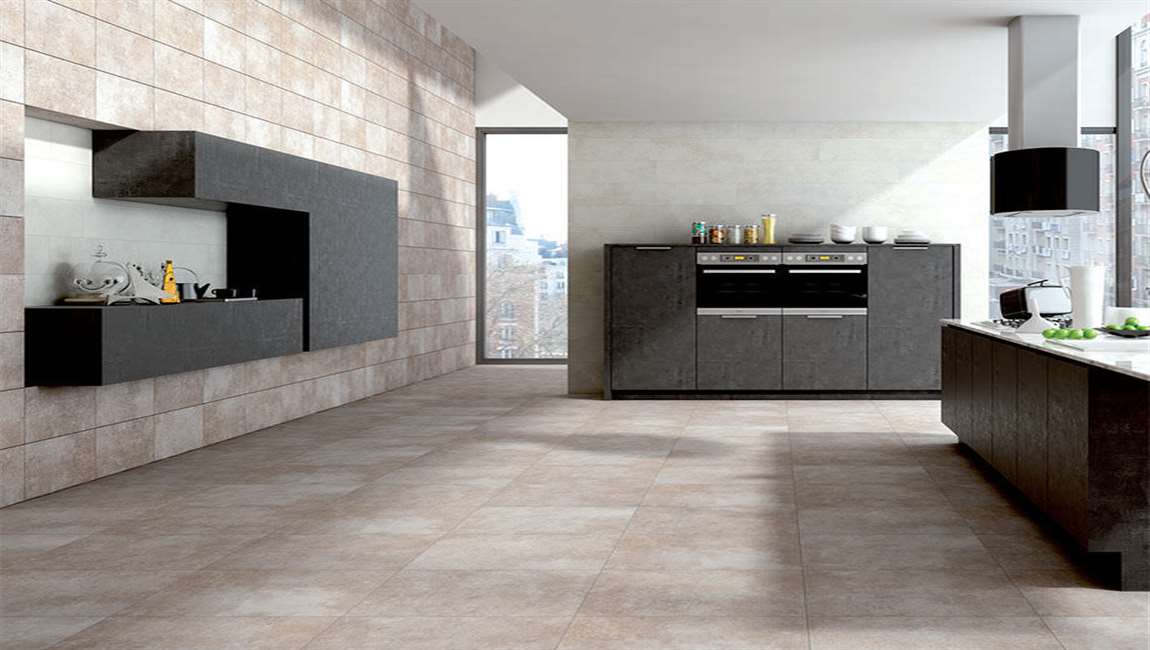
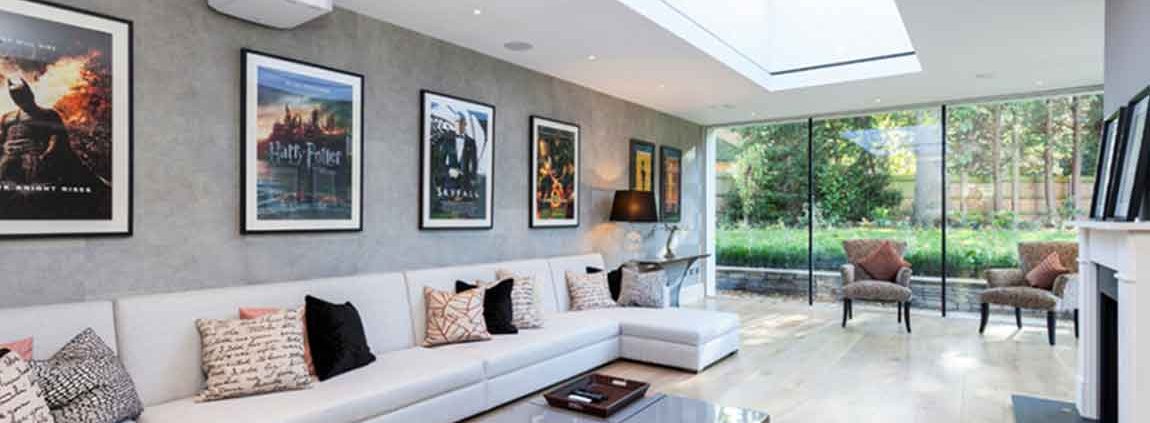
If you choose it right, your wood flooring will last you for years to come. Decorating your home will be a lot easier as well, since beautiful floors make for an excellent base for truly outstanding interior design. By learning how to decide between different types of wood flooring and how to adjust the final touches to match your decor, make sure you choose the best option for your home.


Look for labels on the nail slots in each panel. These slots are often marked with letters to help installers line up rows of panels properly. The vinyl panels are pretty thin, so don’t put the nails in too tightly. Pound the nails in so they’re about even with the upper lip of each panel. That way, the panels can expand and contract as the weather changes.


Attach a top strip to prevent water from seeping behind the vinyl. Use a snap-lock tool to punch a hole every 16 in (41 cm) over the upper furring strip. Set a vinyl strip or J-channel over the strip. Grip the strip between tin snips to guide it onto the vinyl panels. Secure it in place with more galvanized siding nails.


These are the only nails visible in the siding. Consider adding some primer and then painting over them with water-resistant latex paint. Keep the layer of mortar the same depth throughout the wall so the stone veneer fits evenly on the wall. Consider scratching the mortar with a scarifier, a metal rake, or another tool to improve the finished bonding.


Arrange the stone panels on the ground in front of the wall. The panels fit together like puzzle pieces, but you have to assemble them first to ensure they go together. Spread them out face down on the ground and push the pieces as close together as possible to eliminate gaps. Create the finished pattern you want your wall to have.

The Knowledge of Saw Cut Tiles

Wipe away the marker and use a rubbing stone to smooth the edges tile. Use a clean, damp cloth to wipe away the washable marker. The glass tile piece will be sharp and possibly a little rough, so take a rubbing stone, hold it at a 45 degree angle to the front of the tile, and rub it in a parallel motion over the edge to round and smooth it out. Rub the rubbing stone down the whole length of the edge. A rubbing stone can also be used to buff out any small irregularities in the break.


Turn on the saw and let it run for 15 seconds. Give the saw a chance to warm up and get going by turning it on and allowing the water to flow freely over the blade of the saw. Wait about 15 seconds before you begin cutting so you can be sure the saw is functioning properly and the water is flowing smoothly. Warning: If the water isn’t flowing, don’t cut with the saw! The friction could cause the glass to shatter and the blade could heat up and damage the saw.


Line up the cutting guide on the wet saw and the guidelines on the tile. The wet saw will have measuring or cutting guides that will lock the glass tile in place. Use the guide on the wet saw and match it up to the lines you drew on the tile with the washable marker, then slide the guide to lock the tile and keep it from moving. Align the saw carefully, because you won’t be able to undo a cut once you make it.


Push the tile through the saw and away from you. Feed the tile slowly through the saw with a light but consistent pressure as the blade cuts through it. Push with your hands on the edge of the glass away from the blade, keeping your movement continuous. Push the tile through the saw until it cuts all the way through for an even cut and a smoother edge.


Turn off the saw and wipe away the washable marker. When you have finished cutting your glass tile, use a clean cloth to wipe away the washable marker guidelines. Power down the saw and wait for the blade to stop spinning completely before you pick up or handle the saw. Wipe up and dust or glass pieces that may be on your saw or workstation.

How Grouting the Tiles?

Choose a grout. There are two main types of grout: sanded and unsanded grout. Sanded grout is used when the gaps between light color tiles are larger than 3mm. Unsanded grout is used when the gaps between wood tiles are smaller than that. Measure the gaps between your tiles to find out which grout is best for your project.

Glass tiles almost always come in sheets these days and these sheets tend to have very small gaps between the marble tiles, meaning you will probably want unsanded grout. It is important to choose the right grout for your project because not doing so will cause cracks (and all the problems that come with them) in your tiles. There is also technically epoxy grout, which you can use, but it is more expensive and difficult to apply if you do not have experience applying grout.

Mix your grout. Mix your grout according to the instructions on the packaging, making sure to also mix in any additives you want. It should have a consistency like smooth peanut butter. Make sure that you mix no more than what you can spread in 20 minutes. This will keep the grout from drying out. You should only work on small areas at a time, finishing one section before continuing on to the next, so plan on mixing many small batches of grout.

You can get grout additives that make it more mold resistant or water resistant, as well as additives that do things like giving the grout a color. Spread your grout. Grab a grout float and get ready to spread! Working in only a small area at a time (again, what you can cover in 20 minutes), spread the grout onto the wall tiles. Hold the float at a 45 degree angle and criss-cross the gaps between the tiles. You do not want to move the float parallel or perpendicular to any tiles, since this will push the grout out of the gaps.

Let the grout cure for 20 minutes. Use the float to remove the major excess grout and then let the grout begin to cure. Wait roughly 20 minutes, or whatever time is recommended in the instructions for your specific product, so that the majority of the grout can set enough for you to remove the excess that is on the tiles.

How to Grouting and Caulking Before Laying Your Tile?

Allow the tiles to set overnight. Before grouting, caulking, and finishing your job, wait at least 12 hours for the mastic to dry and the wood tiles to set. If you don’t, you could wind up displacing your tiles design. Remove spacers from between your subway tiles. Move over your wood marble tiles from the left to the right and remove all of the spacers you placed to separate the small tiles from one another. If you don’t remove the spacers before applying grout, you’ll have problems with your grout in the future. If the spacer won’t come out, use a flathead screwdriver to pry it out. Be careful not to damage the tile.


Open your premixed grout 15 minutes before you use it. While you can mix your own grout, it is much easier to purchase premixed grout and apply it without preparation. However, make sure you don’t open the grout until you’re ready to use it. If you open it earlier, it may begin to dry before you use it.


Spread grout with a float back and forth. Scoop up a generous amount of grout from your bucket with your float. Spread the grout over the spaces between your tiles. Apply extra grout, as you want to make sure you’re completely filling all grout lines. Avoid filling the space between your ceramic tiles and your counter, appliances, or windows. You’ll fill these in with caulk later.


Remove excess grout with a float. Run your float lightly across the grouted portions of your tile. Use it to scope up as much excess grout as you can. By removing grout, you’ll make your cleanup process a lot easier. You’ll also be able to use the excess grout elsewhere in your project.


Shape your grout with a pen, pencil, or the rounded edge of a float. Take a rounded tool and run it along your grout lines. This will give a slightly concave appearance to your grout lines. It will also help to compact the grout and fill any pockets that aren’t already filled. Use a sponge to remove any grout haze. Dampen a sponge in cool clean water. Wipe your rustic tiles in a back-and-forth fashion. Rinse your sponge after you’ve wiped down one 4 foot (1.2 m) row of tiles. Continue to wipe your wood tiles until you’ve removed any grout or grout haze that remains on them.


Caulk the edges between your marble tiles and cabinets, windows, and appliances. Use a caulk that closely matches the color of the grout you used. Squeeze your caulk gun or the tube slightly to push out just enough caulk to fill the gap. Finally, dampen one of your fingers in warm water and use it to smooth the caulk. You can use a rounded end of a pen, pencil, or another object instead of your finger. Place painter’s tape on the face of the tiles adjacent to where you’ll caulk. Remove the tape shortly after you’ve applied the caulk.