Posts

How to Clean Quartz Tiles?

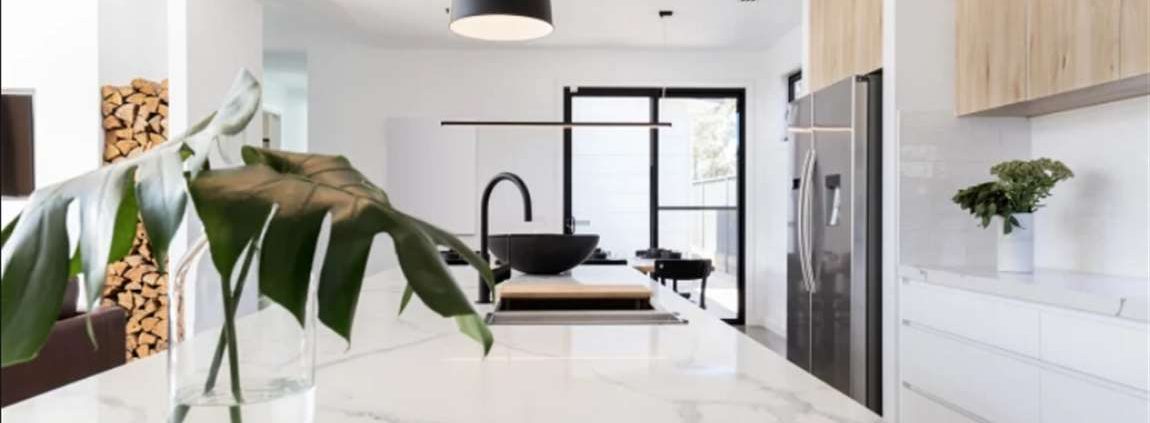
Quartz is a popular material for kitchen tiles and tables. It’s scratch-resistant, antimicrobial, and easy to clean. However, it’s not stain-proof or scratch-proof. Whether you have a quartz tiles or are thinking of installing one, you’ll need to know how to safely perform daily cleanings, tackle stains, do twice-yearly deep cleanings, and make a poultice for especially tough stains.


Wipe down the tiles. Use a clean soft cloth to avoid scratching the surface. Mix equal parts warm water and dish washing liquid. Dip the cloth in the soapy water and wring out the excess. Wipe the surface using gentle counterclockwise strokes. Dry the surface with a clean nonabrasive cloth. Even if you don’t soil the tiles, wipe it down every day to keep it in good repair.


Fight grease with degreasing cleaner. You can buy this product in grocery stores or big box stores. Stick to a product labeled safe for quartz surfaces. Spray the cleaner on a clean nonabrasive cloth. Clean the tiles in a gentle counterclockwise motion. Rinse the surface immediately. As an alternative, you can use disinfectant wipes that don’t contain bleach.


Scrape away hardened spills. This includes egg, nail polish, and similar substances. Use a blunt plastic scraper to tackle these substances. Aim for the underside of the mess, scraping away from your body. Use warm water before anything else. Soak a clean nonabrasive cloth with warm water. Wipe the stain in a gentle counterclockwise motion. Use a clean soft cloth to dry the affected area.


Remove permanent marker with rubbing alcohol. If warm water doesn’t work, wet a cotton ball with isopropyl (rubbing) alcohol. Rub the stain in a gentle counterclockwise motion until the stain disappears. Dry the area with a clean soft cloth. Tackle wine with a magic eraser. Wet the magic eraser under a stream of warm water.

How Preparing Your Work Area Before Grout Wall Tile?

Put on safety protection. Use rubber gloves, eye protection, older clothes that cover your arms, and a smock. If you don’t put on safety protection, you could potentially hurt yourself. This is especially true for eye protection, as you may get grout in your eyes without it. Make sure the room you’re working in is properly ventilated. To do this, open nearby windows and doors. If you have a bathroom vent, turn it on.

Tape plastic covers to surrounding walls and floors. Use painters tape to secure plastic to the area directly underneath where you’ll be working with grout. In addition, place plastic next to the portion of the wall you’ll be working on. This will protect these areas from grout spills or stains.

Remove polished tile spacers from in-between the casstle tiles. If you just laid new cement tile, you’ll want to remove the spacers you used to keep them in a grid pattern. Use needle-nose pliers to remove them. In the end, if you forget to remove them, you’ll wind up putting grout right over them. This could cause your grout to decay rapidly in the future.

Mix your grout until it is smooth and consistent. Read the directions on your grout product. Then, pour the appropriate amount of water into a bucket. Add the amount of grout powder the package specifies. Use a trowel or a paddle mixer attached to a drill to mix the grout until it has a consistency like toothpaste. After mixing your grout, let it sit for about 10 minutes before using it.

If your grout seems liquidy, add a little more powder. If your grout seems very thick, add a little bit of water. Alternatively, purchase pre-mixed grout to ensure it has the right consistency. Mix your grout every 15 minutes. Take your float/trowel and lightly mix the grout every 15 minutes. Do this by moving your float in a circular fashion through the grout. If you don’t mix the grout regularly, it will wind up setting and you won’t be able to work with it.

How to Install Ceramic Tile on Sub Floor?

Once you’ve determined the thickness of the underlayment you will use, the steps of installation are the same. Dry fit your sheets of cement board to the area you are tiling. To cut the board you can either use the side grinder with diamond blade, or you can score and break the material.

The cement tile department personnel can show you the available scoring knives. Your joints between sheets should not exceed 1/8 inch. It is also advisable to install the sheets perpendicular to the direction of the floor tile. This adds additional strength and stability.

Install the sheets one at a time. Mix your thinset according to the instructions on the bag. Lift one sheet (leave the rest in place) and spread thinset directly onto the bathroom floor filling the area left by the sheet (use a 1/4″ x 1/4″ notch trowel). Once you have filled the space place the sheet down onto the thinset. Secure the cement board with the screws using the pattern directed by the board manufacturer. Repeat with the remaining sheets of cement board until finished.

Apply the crack suppression membrane over the joints of the boards. You will use the flat trowel to apply a thin layer according to the manufacturers specifications. (e.g. 6-18″ width across the joint). This will distributed the stress caused by movement of the subfloor tile and prevent cracking in your wood marble tile. If greater protection is desired you can cover the entire floor with the membrane. Let dry for 24 hours.

Complete the installation. The remaining steps are identical to installing tiles price on a concrete slab, less one tip: Use a damp sponge to wipe the cement board prior to applying thinset. This will keep the cement board from drying the thinset too fast and allow proper adhesion to the wall tiles design.